Butter blocks
- Template – Use a parchment paper to create a template 12 x 6-inches (see video) – set aside.
- Cream – In the same bowl of the electric mixer bowl (no need to wash), cream the butter and flour just until combined. Transfer to the prepared parchment paper template. Spread evenly with a spatula. Use a rolling pin to guide it inside of the template towards the corners (see video)
- Divide – Use a ruler to mark them at 6 inches. So, now this will give you two 6 x 6-inch blocks (see video).
Pro tip – we need 2 sheets of butter 6 x 6 inches each. You can use a 6-inches square baking pan to make two such blocks. This 12 x 6 method ensures the blocks are even.
Pro tip – be gentle with the rolling pin using a spreading motion so the butter doesn’t come out of the corners.
- Chill in the fridge for 15 minutes.
Pro tip – We want the fat to be cold but still be flexible so that when we roll it will spread between the folds. If you chill too long it will break rather than spread.
Laminate the dough
- Roll – Transfer the dough to a lightly floured surface. Roll to a long rectangle of 7 x 18-inches.
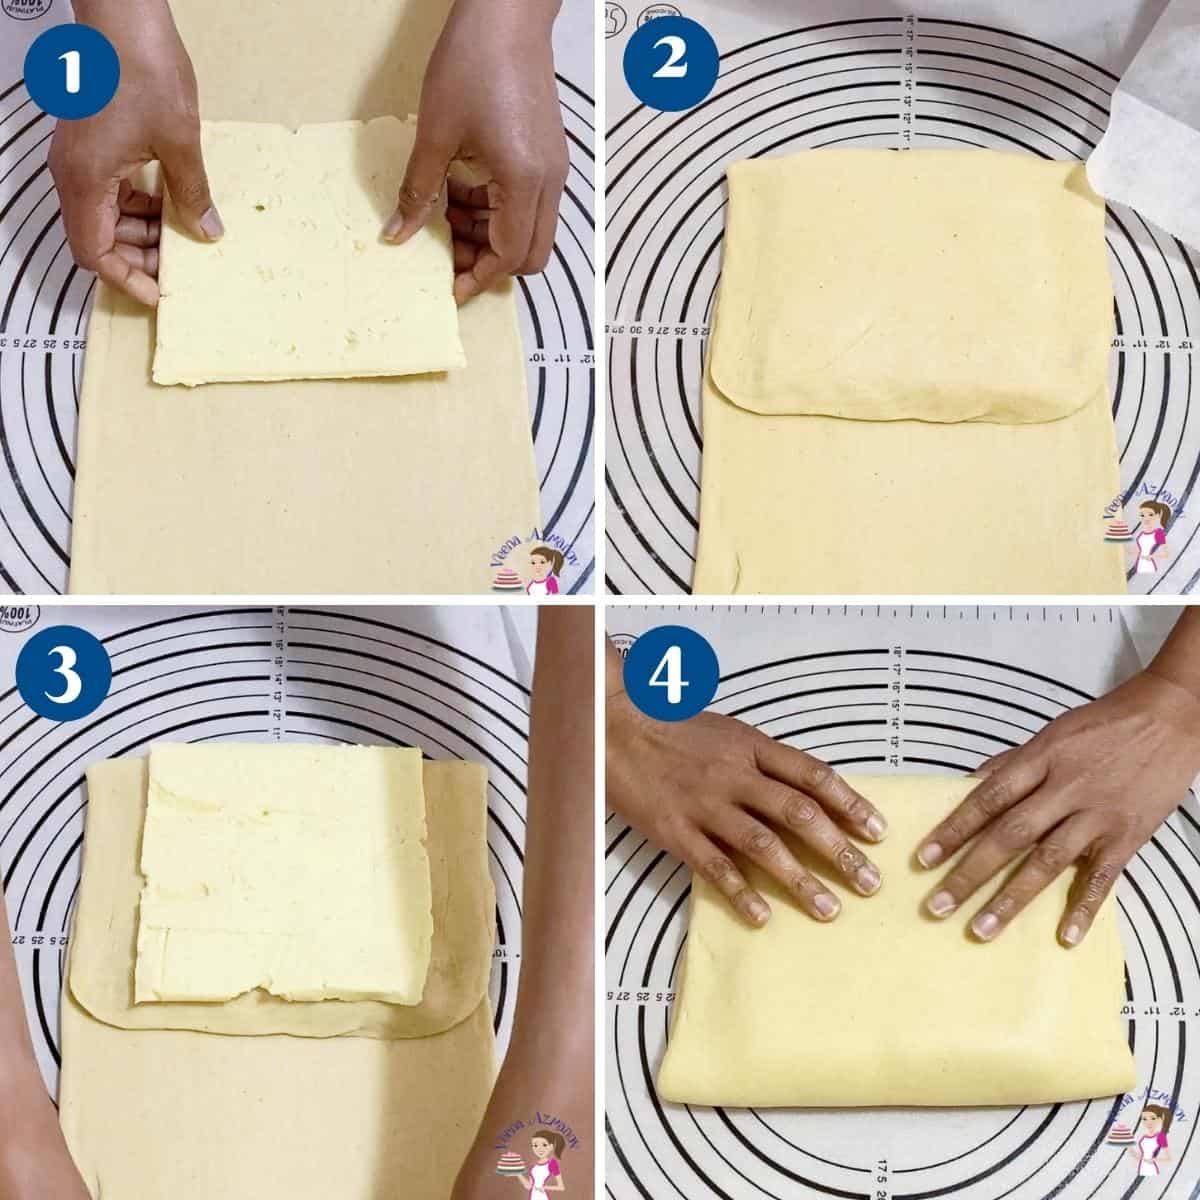
- Fold – Open the butter block and divide it into 2 at the mark you created. Now you should have two – 6 x 6-inch blocks. Place one block over the center. Fold one side over. Then, place the second block on top and fold the other side over.
Pro tip – Now you should have layers of dough, butter, dough, butter, dough – makes sense?
- Chill – Wrap the dough, place it on a baking sheet, and into the refrigerator – chill for 15 minutes.
Pro tip – if the dough and butter are still cold when you wrap you can continue with the first fold. Also, in warm places, you may need more cooling time.

Folds / turn
- Turn the dough – Roll the chilled pastry dough into a rectangle – with the short side facing you. Roll to a rectangle approximately 6 x 12-inches.
- First fold – Fold the dough lengthways into thirds like a business letter (see video). Wrap in plastic on a baking sheet and place into the fridge to chill for 30 minutes.
- Second fold – Roll the dough lengthways again with the short side facing you – (see video) to about 6 x 12-inch long again. Fold the dough into thirds again like a business letter (see video). Place in the fridge for 30 minutes if necessary.
- Third fold – Roll the dough lengthways again with the short side facing you – (see video) to about 6 x 12-inch long again. Fold the dough into thirds again like a business letter (see video).
- Chill – After the third fold, chill in the fridge for at least two hours or until well chilled. This can be chilled for up to 48 hours.
Pro tip– it is very important that the dough be well cold before using; otherwise, the folds will blend ruining all your effort.
- Divide – Roll the dough into a 6 x 12-inches rectangle. Divide into 2. Place one in the fridge while you work on the second one.
Pro tip – you want to work in batches so the dough stays cold at all times. Also, it means you won’t roll too thick.
Shape the dough
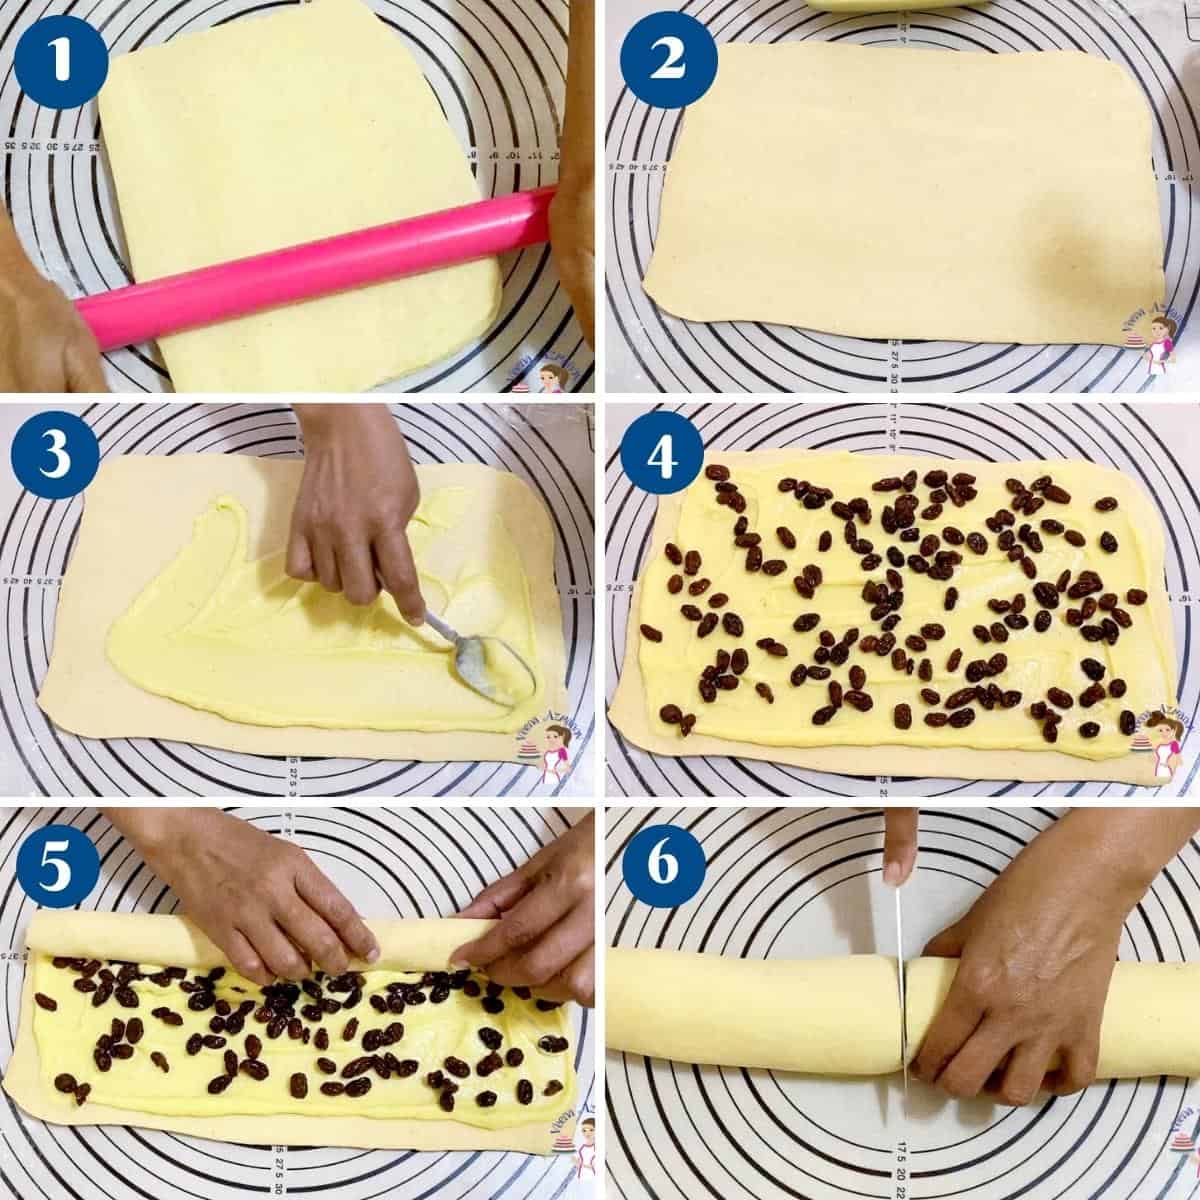
- Rectangle – Roll the dough to about a 10 x 12-inch rectangle.
Pro tip – it is very important that the dough is very chilled when you roll otherwise the butter can ooze out of the sides and you will not have a flaky pastry.
- Fill – Spread a generous amount of pastry cream over the dough making sure to get all the corners as well. Sprinkle the soaked and drained raisins. Roll the dough (like a jelly roll).
Pro tip – this process is similar to making cinnamon rolls. If necessary chill the dough in the fridge again before slicing.
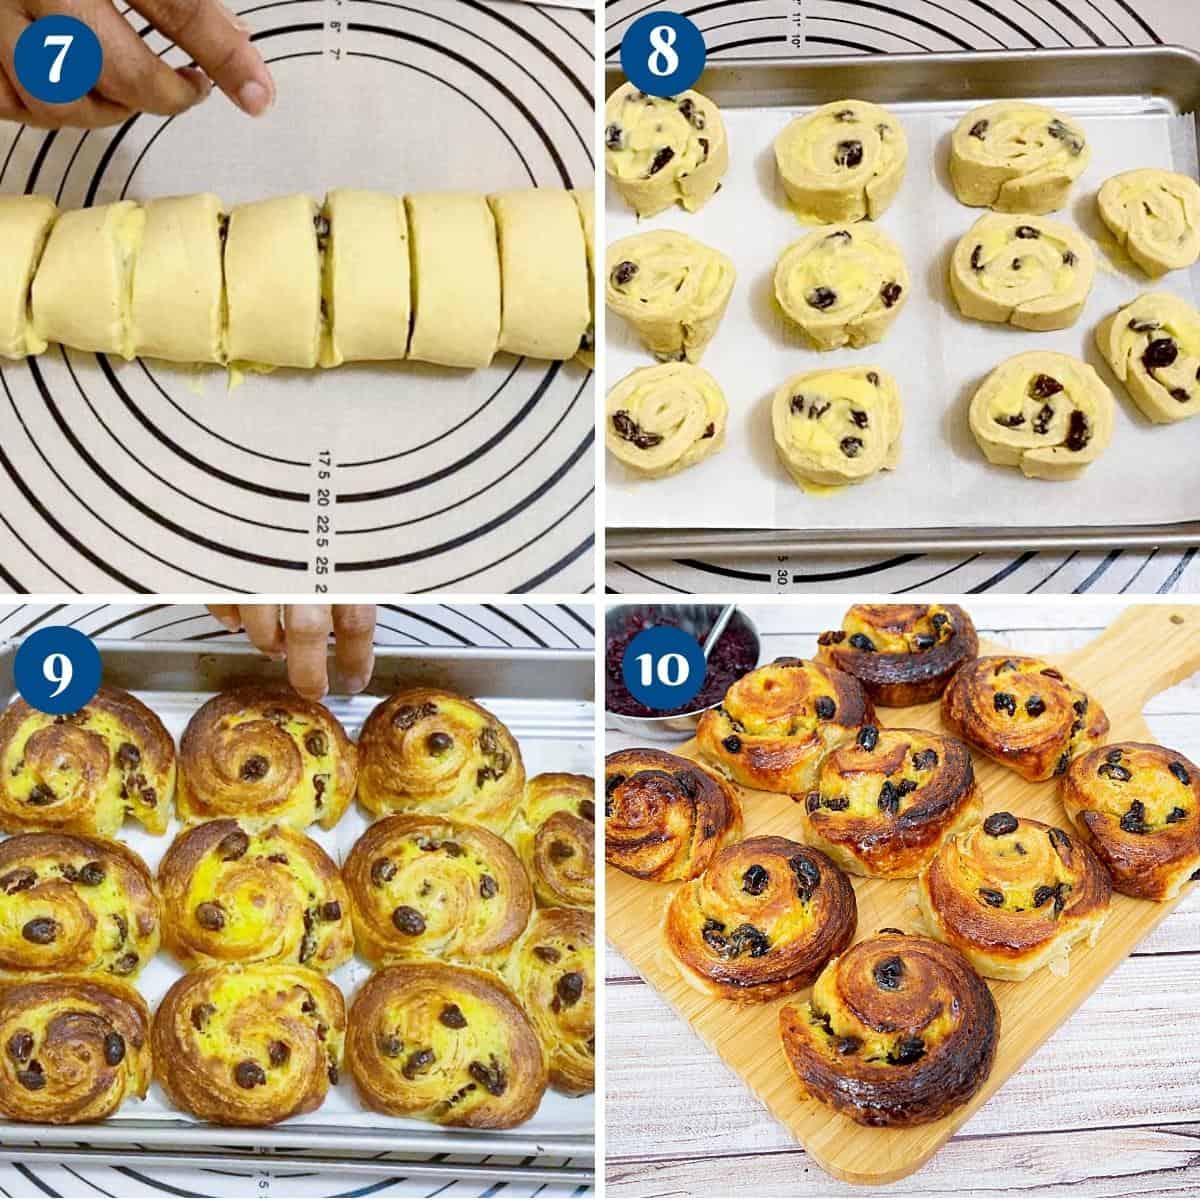
- Divide – Cut into 1 1/2-inch slices, (about 12). Cut half, then each half into half until you have 12 pieces. Place on a silicone mat or parchment-lined baking tray
- Proof – Place on a baking tray and cover the pinwheels with a clean kitchen cloth – let poof for 45 minutes.
Bake the danish
- Oven – Preheat the oven at 375°F/ 190°C / Gas Mark 5. Brush the pastry with a beaten egg.
- Bake – Bake in the hot oven for 20to 25 minutes until rich golden brown.
Pro tip – if the pastries become too dark while baking, tent them with an aluminum foil.
- Glaze- Remove from the oven and let cool on the tray for 10 minutes. Then, using a pastry brush glaze them with the prepared apricot glaze. (below)
Pro tip – if you brush while the pastry is very hot it will absorb all the glaze and become too sweet and you won’t have that shiny appearance.
- Cool – Transfer to a cooling rack and cool them completely before storing. These pastries are best enjoyed on the day they are baked. But, they also freeze well for months.

Please continue to the next page (>) for the full list of ingredients and complete cooking instructions. Enjoy this meal!