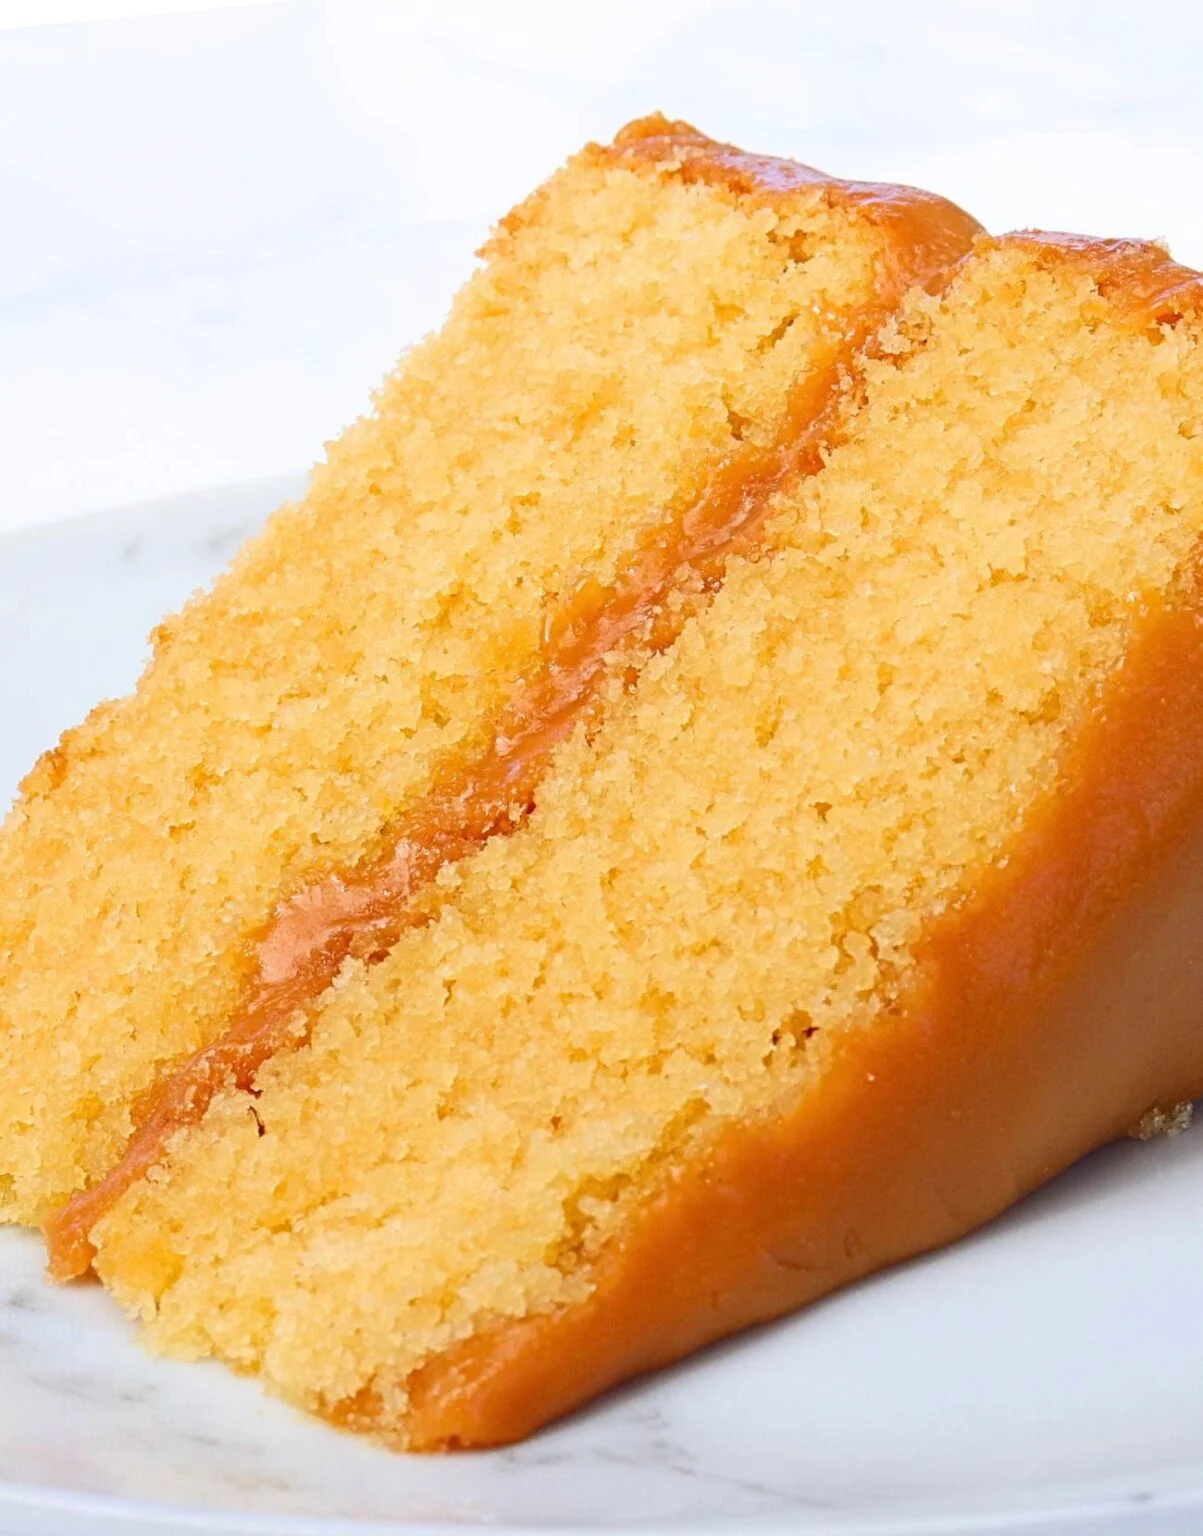
This is hands down the best caramel cake I’ve ever had! It consists of super moist vanilla brown sugar cake layers, topped with a luscious and deep flavored caramel frosting that isn’t sickly sweet. This is a southern style caramel cake recipe – a caramel lovers DREAM cake!
Prep Time: 1 hour 30 minutes | Cook Time: 28 minutes | Cooling Time: 1 hour | Total Time: 2 hours 58 minutes | Servings: 12 slices
IMPORTANT: For accuracy, I would recommend using the gram measurements provided as those are the exact quantities I use. Cup measurements are given as estimates (based on US cup measurements) to make it easier for those who do not have a scale.
Ingredients
Caramel Cake
- ▢ 2 cups (250 g) flour – plain, all purpose
- ▢ ¼ cup (30 g) cornstarch
- ▢ 2½ tsps baking powder
- ▢ ½ tsp salt – omit if using salted butter
- ▢ ¾ cup (170 g) unsalted butter – room temperature
- ▢ ¼ cup (55 g) unflavoured vegetable oil – I use canola oil
- ▢ 1 cup (200 g) white granulated sugar
- ▢ ½ cup (100 g) soft light brown sugar
- ▢ 3 large eggs – room temperature
- ▢ 1 tbsp vanilla extract/essence
- ▢ ½ cup (120 g) sour cream – room temperature
- ▢ ½ cup (120 g) milk – full fat, room temperature
Caramel Frosting
- ▢ ¾ cup (170 g) unsalted butter – room temp
- ▢ 1½ cups (300 g) white granulated sugar
- ▢ 2 cups (510 g) evaporated milk – 1 and 1/2 12 ounce (340g) cans
- ▢ ¼ tsp salt – omit if using salted butter
- ▢ ⅓ cup (80 g) cream – room temp, any cream (whipping, heavy cream, etc.) will work
- ▢ 1½ tsps vanilla extract/essence
Instructions
Caramel Cake
- Preheat oven to 160 °C (320°F) with the fan on (see note 1 if you don’t have a fan function) and grease or line two 8 inch cake tins (I use my homemade cake release).
- Sift together flour, cornstarch, baking powder and salt. Using a whisk or fork, mix until well combined. Set aside for now.
- In a large bowl combine butter, vegetable oil, white sugar and brown sugar. Using an electric mixer (hand or stand mixer are both fine – see note 2), cream together for 2 minutes until light and creamy.
- Add in eggs one by one, mixing well in between each addition (about 10-15 seconds between eggs).
- Next add in sour cream and vanilla and mix until well combined. Now set your mixer aside as the remainder of the batter will be finished by hand.
- Finish off by adding in half of your premixed dry ingredients to your wet mixture, and gently fold it in with a spatula until just combined. Then add in the milk, and fold it in until just combined. Lastly, add in the remaining dry ingredients and gently fold it into the mixture until just combined. Do not overmix (see note 3).
- Distribute the batter evenly into the two 8 inch cake tins, and bake for 28- 30 minutes or until a toothpick comes out clean.
- Once baked, allow the cake layers to cool in the cake tins for about 15-20 minutes, and then turn them out onto a wire rack to completely cool before frosting with the caramel.
Caramel Frosting
- Place a large saucepan over a medium heat and add in butter, sugar, evaporated milk and salt. Allow everything to melt together and come to a simmer, stirring continuously. Once simmering, turn the heat down to a low-medium heat.
- Allow the caramel to thicken up slowly for about an hour, stirring every few minutes to make sure the caramel isn’t burning. Be sure to check on it more frequently once it starts to thicken up as this is when it is more prone to burning. Once it is thick (see video for visual), and a deep golden brown colour, add in the cream and vanilla. Stir until the caramle is smooth, and then immediately pour it into a heat proof dish.
- Allow the caramel to cool for about 25 minutes before frosting the cake. You still want the caramel to be slightly warm and runny when frosting the cake, as it sets up quickly once you come to using it (see note 4 if caramel is too thick).
Assembly
- Once cakes are cooled, level the tops with a serrated knife so that the cake layers are flat.
- Place the first cake layer onto your cake stand/serving platter and place a generous amount of the caramel frosting on top and smooth it out with an offset spatula or knife.
- Place your next cake layer on top and cover the top and sides with more caramel frosting (see note 5 if caramel is too thin and not setting up). Once the caramel starts to set up, you will notice it become shiny. You can run an offset spatula or knife gently on top of the shiny caramel and this will make everything super smooth! Decorate as you wish and enjoy!
Notes
- Note 1. In this recipe I use an oven with the fan function turned on. The fan forced function cooks cakes faster, so if your oven doesn’t have a fan option, then you will need to increase the baking temperature to 175°C (350°F) so that the cake bakes at the same rate as mine 🙂
- Note 2. If using a stand mixer, then use the paddle attachment for the initial mixing, but continue to do the last step by hand as stated in the recipe.
- Note 3. By gently folding in the ingredients, it prevents too much gluten from forming, thus giving us a softer cake. Only mix until the strands of flour have disappeared and the batter is uniform.
- Note 4. If the caramel has cooled down too much and is too thick when you come to frosting the cake, then simply heat it up a little (either in the microwave or on the stovetop), or stir in a little more cream to thin it out.
- Note 5. If the caramel is too thin and isn’t setting up when frosting the cake, then it’s most likely due to your caramel still being too warm. Let it cool down and thicken up for a further 15-20 minutes and then use it 🙂
Nutrition
Calories: 688kcal | Carbohydrates: 79g | Protein: 8g | Fat: 39g | Saturated Fat: 21g | Polyunsaturated Fat: 4g | Monounsaturated Fat: 10g | Trans Fat: 1g | Cholesterol: 139mg | Sodium: 318mg | Potassium: 234mg | Fiber: 1g | Sugar: 59g | Vitamin A: 1106IU | Vitamin C: 1mg | Calcium: 220mg | Iron: 2mg
Nutritional information are estimates only as they are automatically calculated by a third party application. Actual values may differ based on brands and types of products used.