INGREDIENTS FOR FLUFFY EGGNOG CINNAMON ROLLS
There are four distinct parts to this small batch of cinnamon rolls: the soft dough, the buttery cinnamon-nutmeg sugar filling, the syrupy spiced topping, and the eggnog frosting on top.
YEAST DOUGH FOR CINNAMON ROLLS
Yeast breads can be lean (just yeast, flour, and salt) or enriched (yeast, flour, eggs, butter), and in the case of these eggnog cinnamon rolls, we’re making an enriched dough:
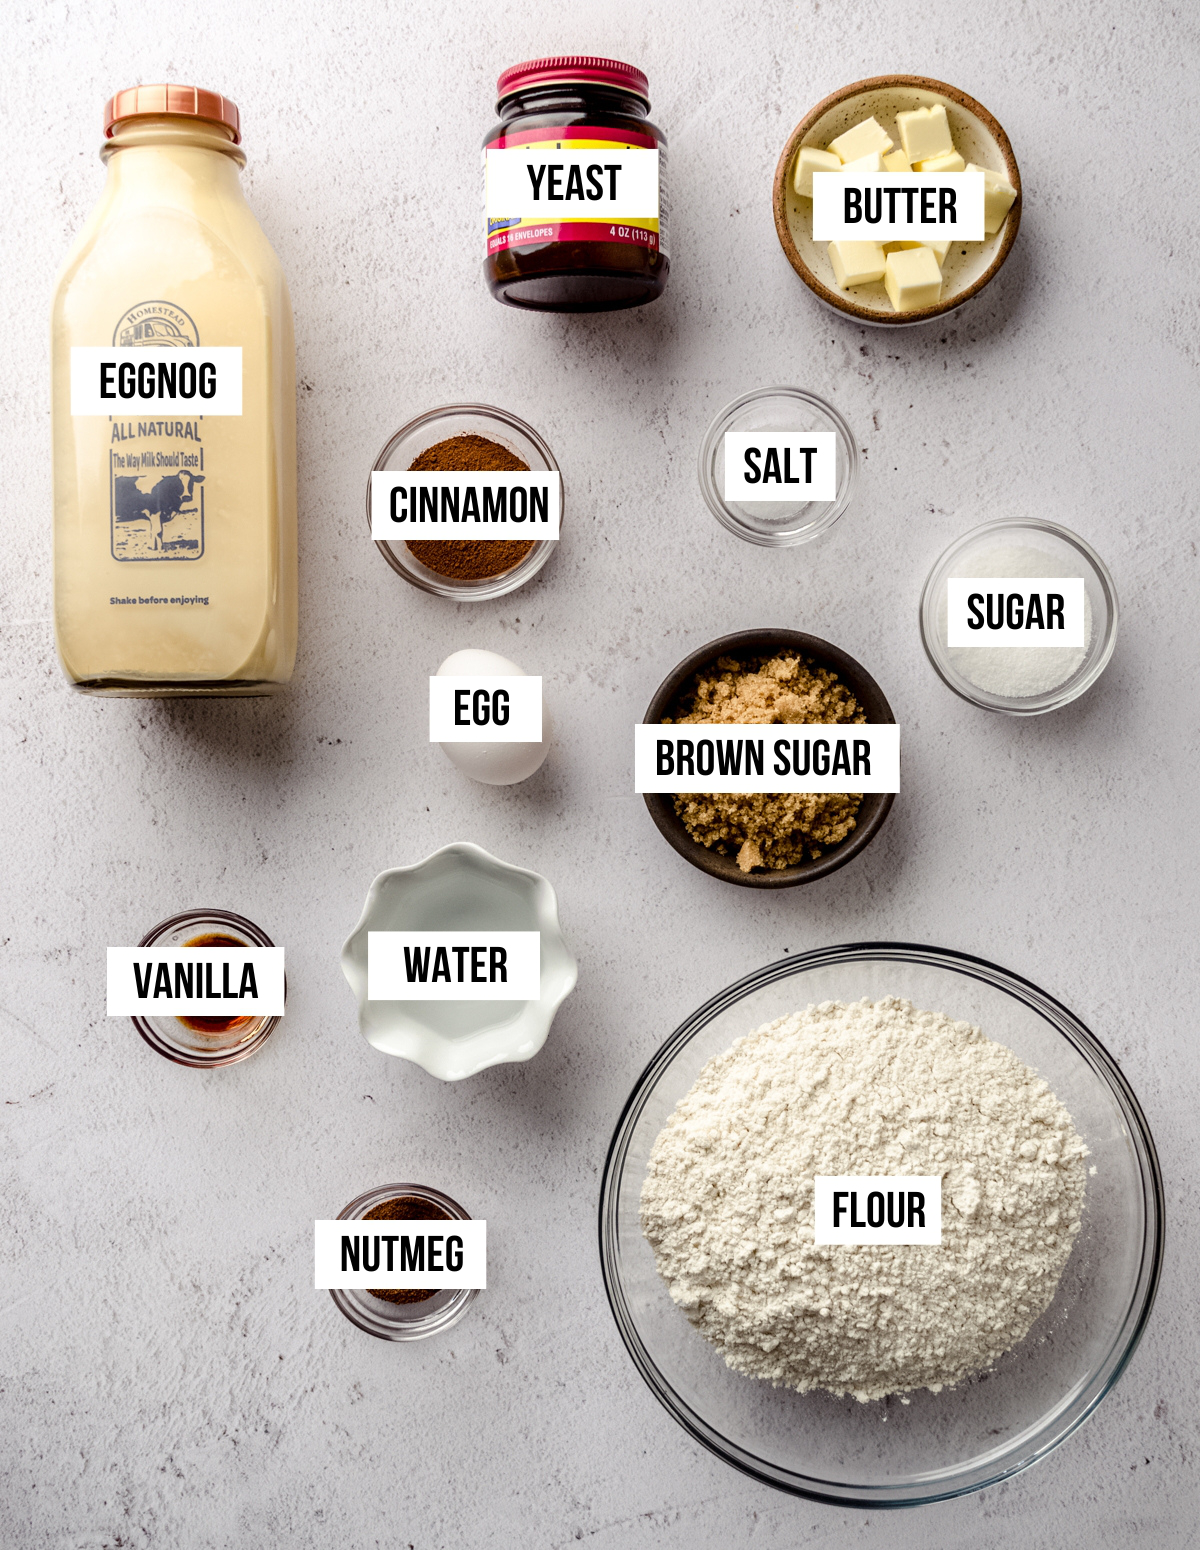
For these rolls you will need:
• warm water
• active dry yeast
• warm eggnog
• granulated sugar
• salt
• vanilla extract
• an egg
• all-purpose flour
• softened butter
SPICED SUGAR FILLING
For the filling, we are loading up the insides of these rolls with tons of flavor. The best homemade cinnamon rolls are absolutely stuffed with cinnamon sugar filling, and these eggnog rolls are no different. We’re adding nutmeg to an already super cinnamon-y (technical term) filling.
For the filling, you’ll need:
• melted butter
• granulated sugar
• brown sugar
• ground cinnamon
• ground nutmeg
SPICED SYRUP TOPPING
The addition of a syrup to the rolls before baking gives them even more flavor and ensures you’ll have cinnamon-nutmeg sugar in every single bite.
For the spiced syrup, you will need:
• butter
• brown sugar
• ground cinnamon
• ground nutmeg
EGGNOG CREAM CHEESE FROSTING
This easy cinnamon roll recipe includes a version of my cream cheese frosting. I wanted to keep the traditional flavor of a cream cheese frosting, but with the nature of these gooey rolls and modeling them after the TikTok ones, I wanted something a little looser.
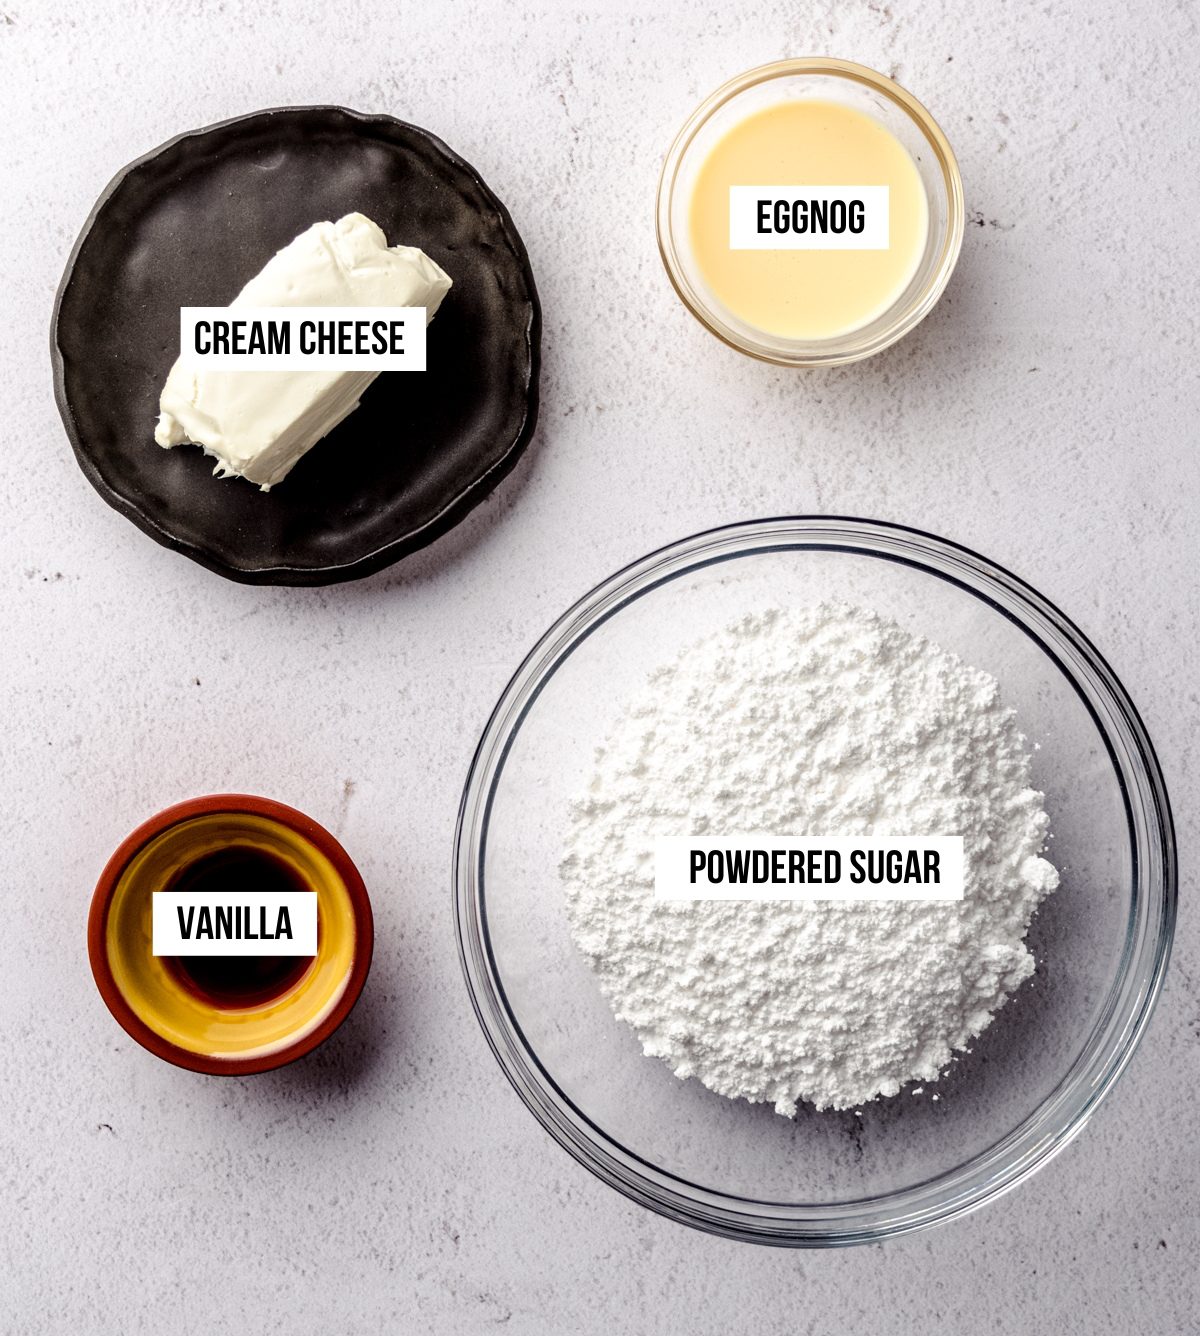
For the eggnog cream cheese icing, you will need:
• full fat block cream cheese
• eggnog
• powdered sugar
• vanilla extract
• salt
HOW TO MAKE MY EGGNOG CINNAMON ROLL RECIPE
If this is your first time making an enriched yeasted dough, I’m here with all the helpful pictures, explanations, and to basically walk you through this whole thing. I promise, it’s very simple, and you’re going to wind up with six perfect cinnamon rolls at the end of the whole process, guaranteed!
PROOF THE YEAST
First, you’ll want to ensure that your yeast is good and alive. Inactive, expired, or dead yeast will result in deflated sad cinnamon rolls. Let’s make sure that yeast is working before we do all that work for nothing!
Pour some warm water into a bowl (you’re aiming for about 110ºF [43ºC] on an instant read thermometer). If you don’t have one of those, simply use your wrist as a guide to get the temperature just right.
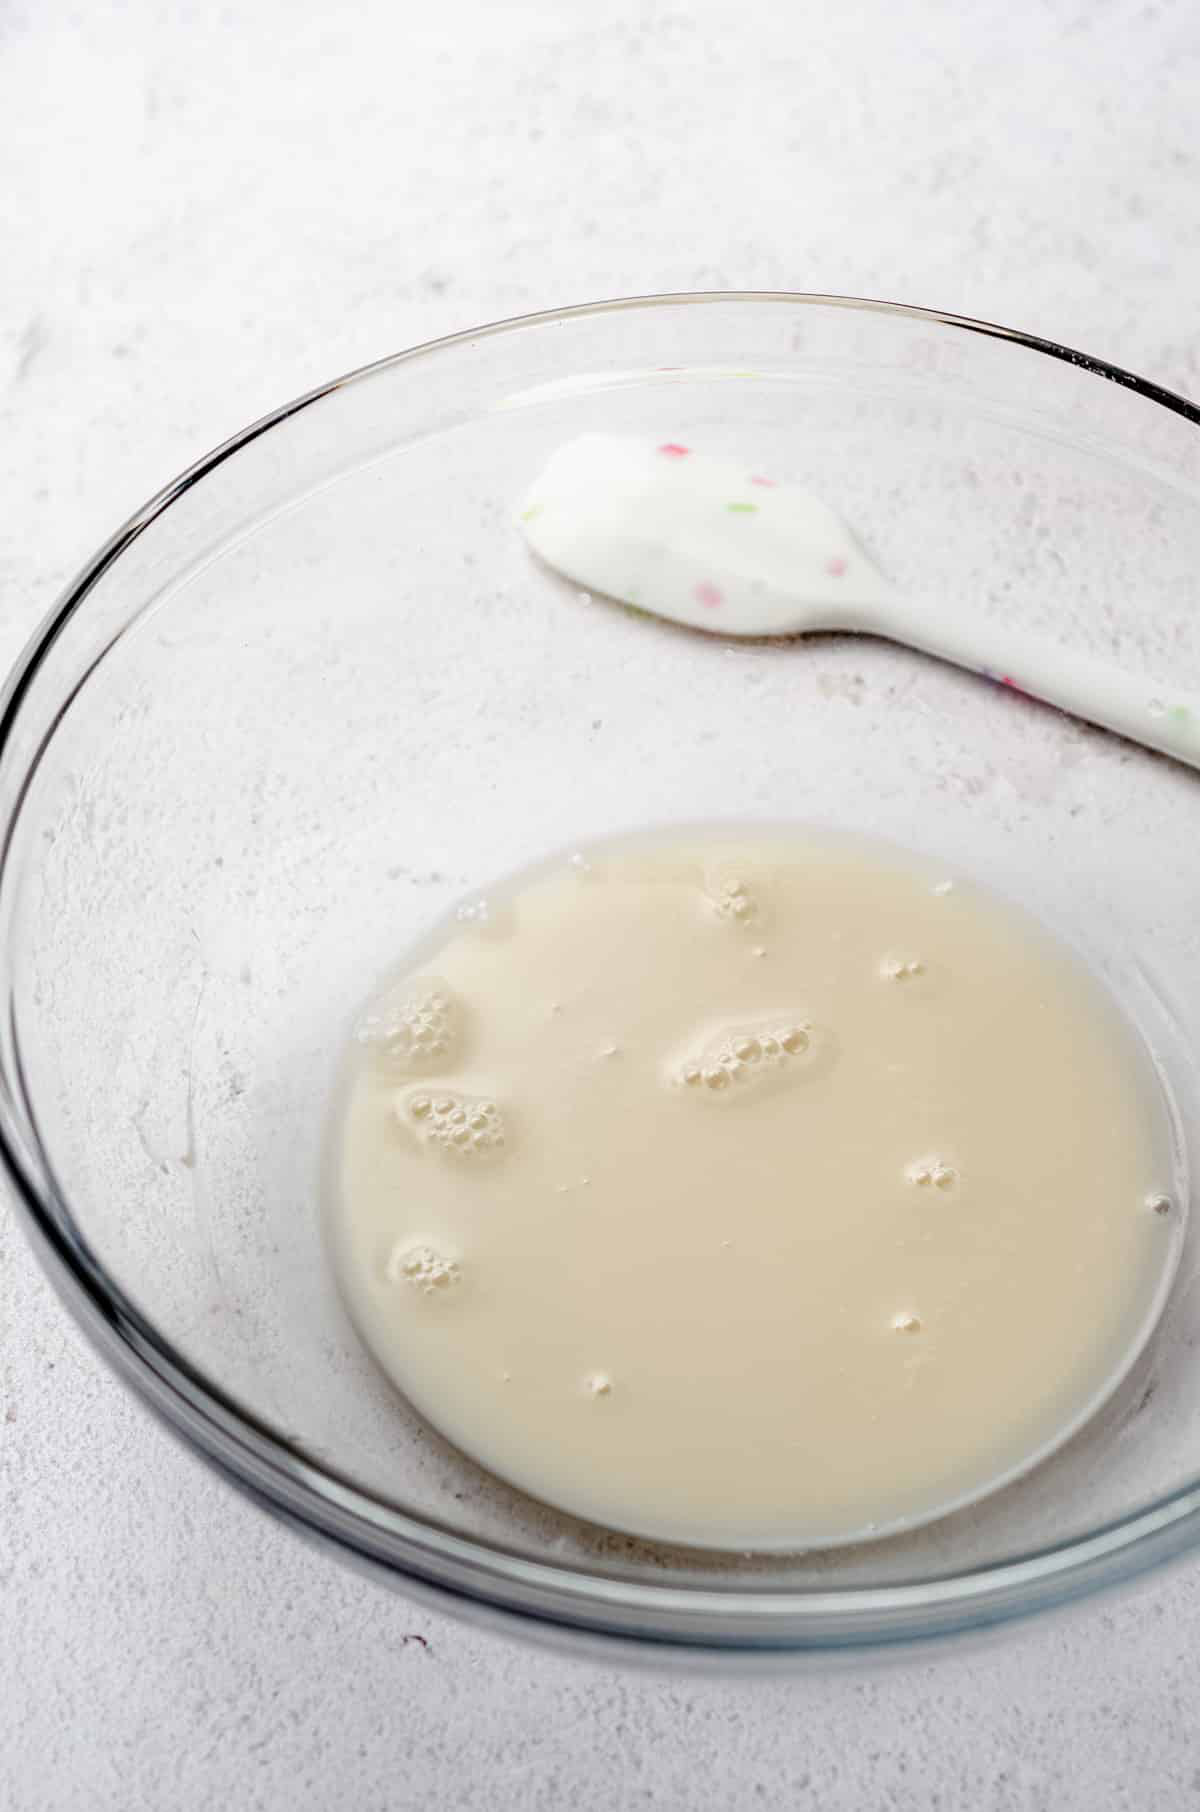
Hold your wrist in a stream of warm water from the tap. If you can feel the temperature of the water, it’s either too warm or too cold. If the feeling seems to disappear into your skin, it’s perfect.
Sprinkle the active dry yeast over the water, whisk it with a fork, spatula, or wooden spoon, then allow it to activate while you prepare the rest of the ingredients.
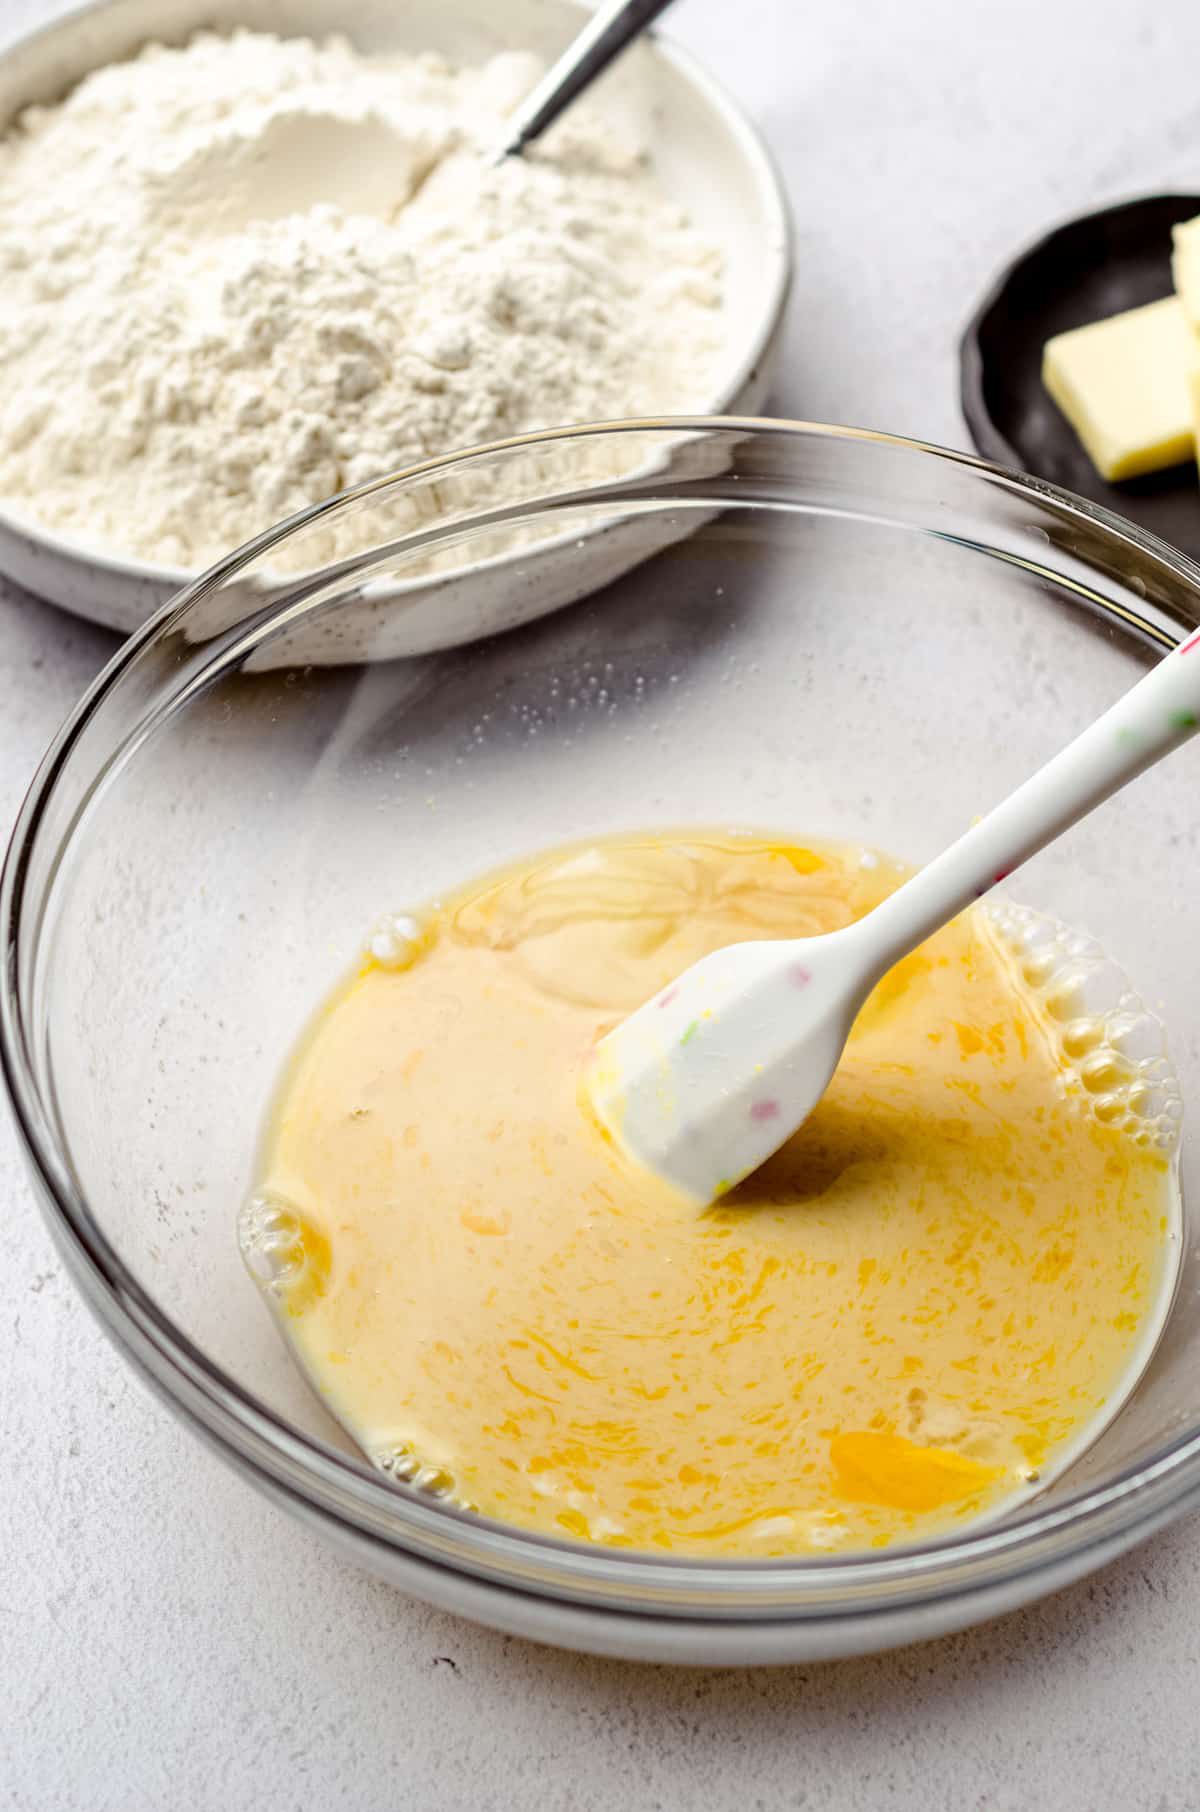
MIX THE DOUGH
Once your yeast appears active, you’re going to add the warm eggnog, sugar, salt, vanilla extract, and egg. Mix all of these ingredients together, then start adding the flour.
FRESH
I prefer to use a wooden spoon or silicone spatula and my hands to make my yeast doughs, but you are welcome to use the dough hook attachment and the bowl of a stand mixer.
I find doing things like making cinnamon roll dough by hand gives me more control and helps me understand better exactly what my yeast dough needs, but especially if you’re a beginner, there’s nothing wrong with using a stand mixer.
You’ll start by adding just 1 cup of the 2 and ¼ cups total and allow the dough to come together.
Once together, you’re going to add the softened butter, which has been cut into pieces, to the dough. This might seem odd and lead to a strange texture, but just like we cut fat into homemade pie crust and buttermilk biscuits to create flaky layers, we’re doing the same here with our eggnog cinnamon rolls, so just trust the process.
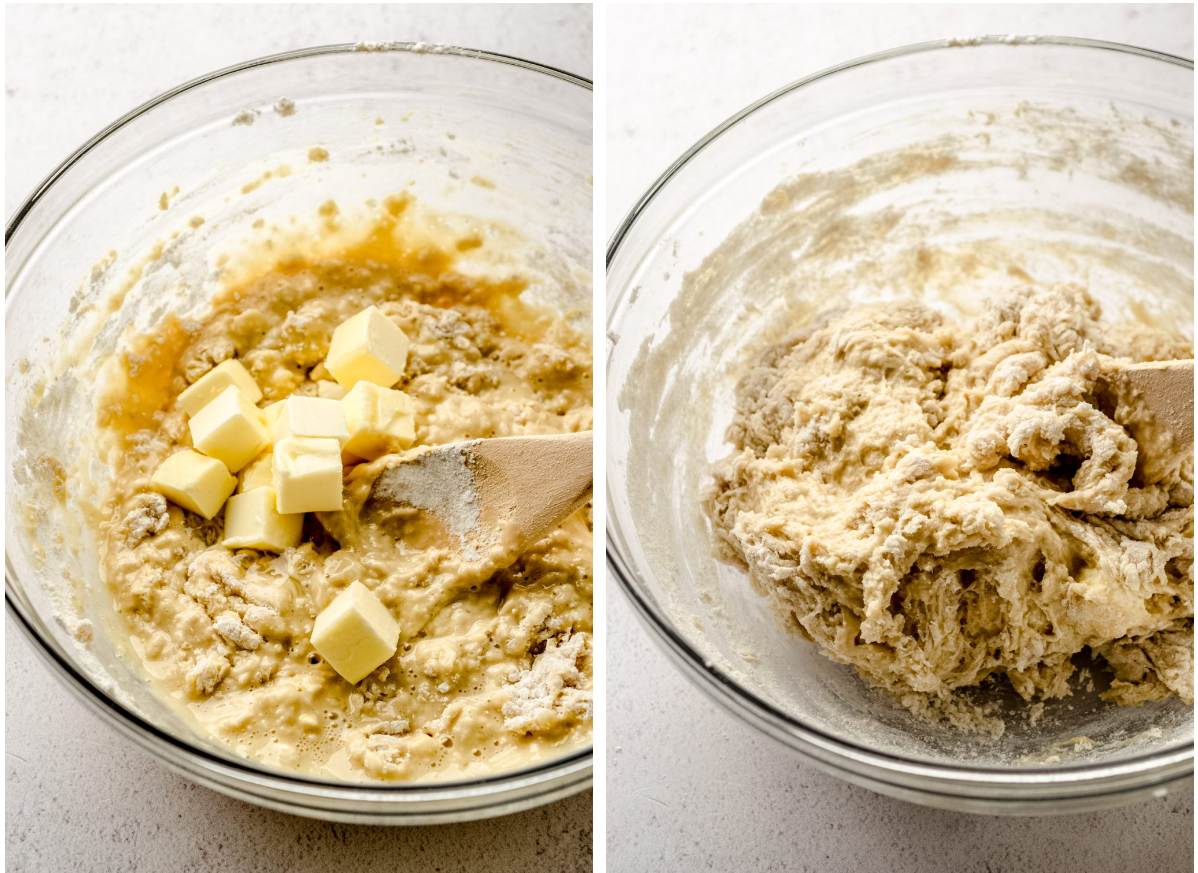
When the butter is mostly incorporated, add the remaining 1 and ¼ cups of flour and continue to blend until the dough has mostly come together. It will likely still be shaggy, but it should pull away from the sides of the bowl fairly easily.
Next, turn the dough out dough on a well-floured surface. I’ve built wiggle room into this homemade cinnamon roll recipe for adding more flour, but kneading by hand in this step is where you will become the most familiar and comfortable with what the texture of enriched yeast dough should feel like.
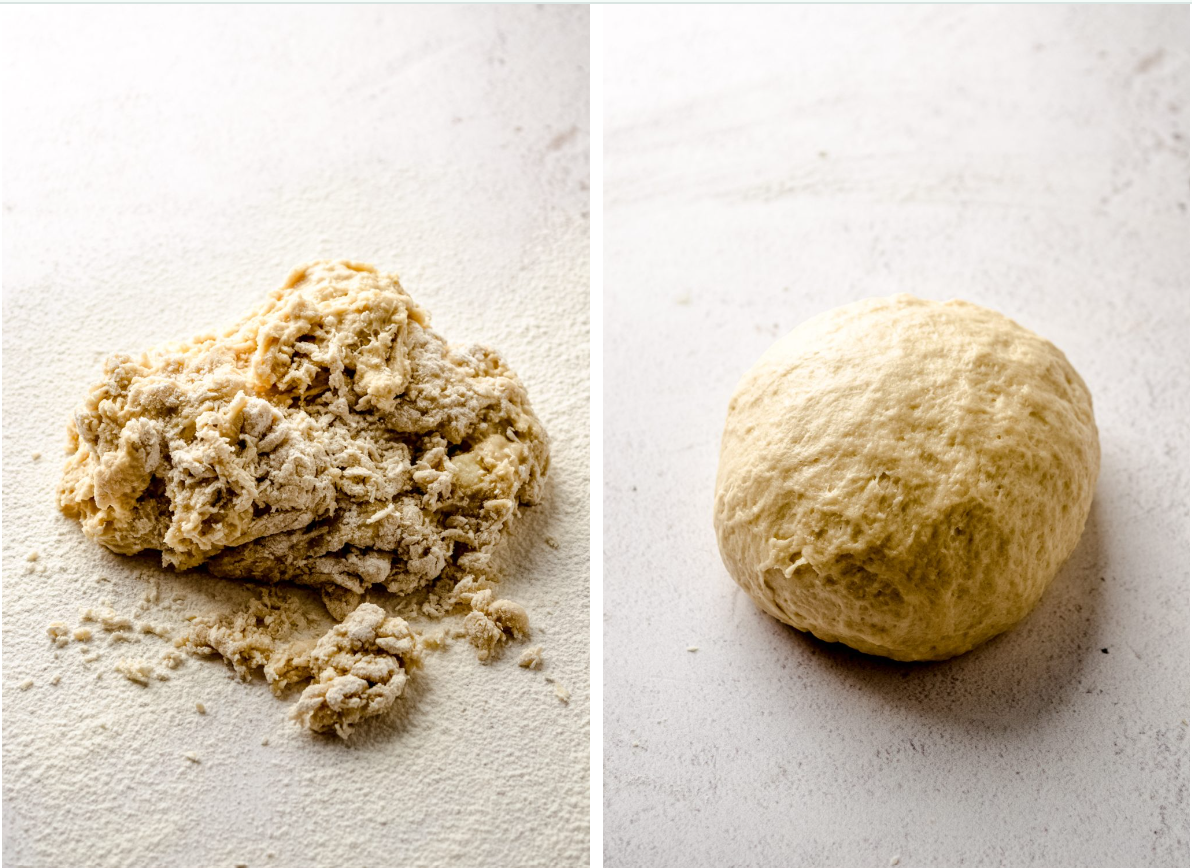
You’ll want to knead your dough for about 8-10 minutes, adding flour about 1 Tablespoon at a time if the dough is too sticky, until it smooth and elastic.
I know it sounds like a long time to be kneading, but you can take short breaks when you need to! There is no reason to rush this process.
When it’s done, your dough should resemble the surface texture of PlayDoh when it is done.
ALLOW TO REST
During yeast bread making, this is where you’ll allow your dough to have a first rise. Allowing the dough to rise builds the gluten structure, but since we are going to roll and shape this dough, we want the gluten structure to be quite relaxed, otherwise we’ll have a hard time trying to shape it into rolls.
Your dough will only need about 10 minutes to rest, so fill the time by getting the filling ingredients ready to go.
MAKE THE FILLING
I’ve found that the best cinnamon roll filling is done in two parts: a butter layer and a separate spiced sugar mixture.
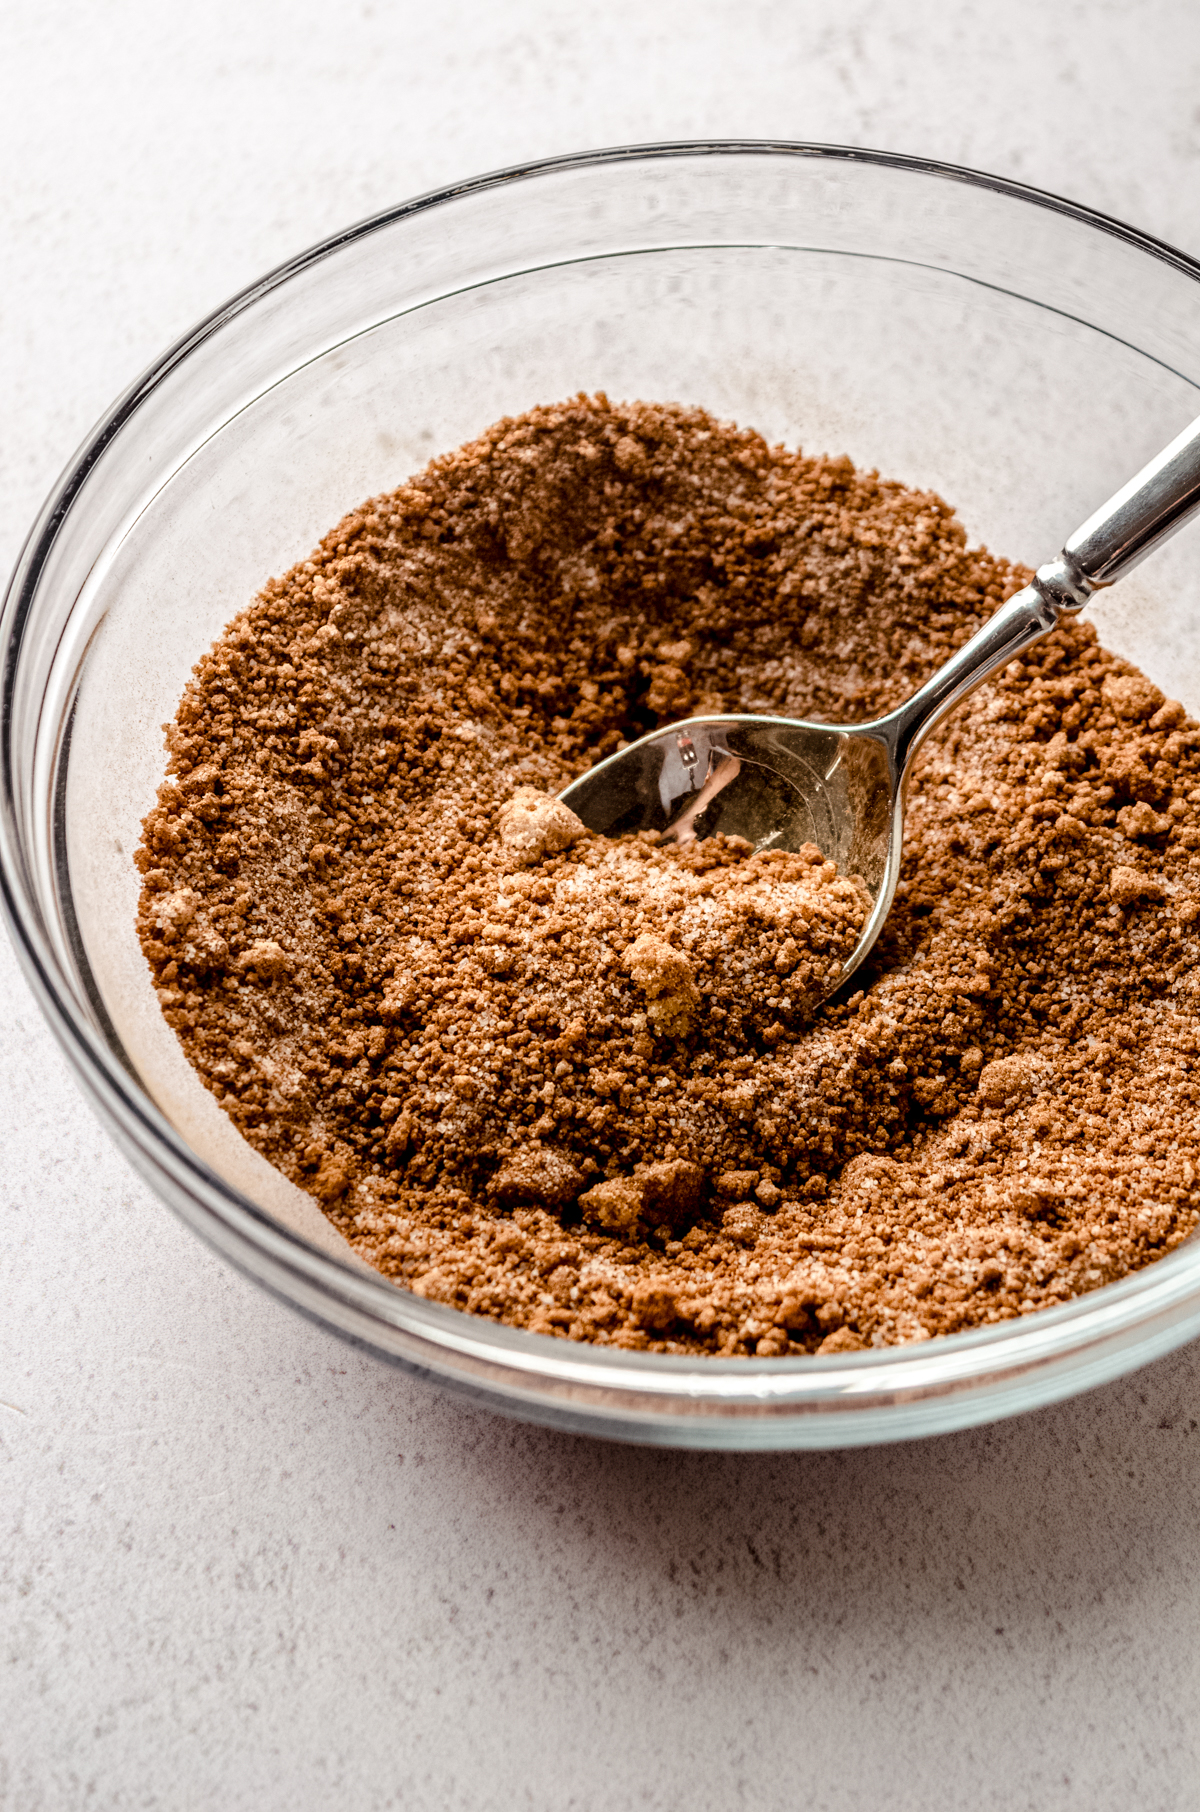
It will look like a ton of filling, and it is! There is no shortage of flavor in these rolls and plenty of filling to go around.
PREPARE THE DOUGH
Once the dough has rested for about 10 minutes, it will be nice and pliable and willing to shape.
Use a rolling pin and your hands to gently stretch the dough into a large rectangle that is about 9″ by 12″ in size.
While this measurement doesn’t need to be perfectly exact, I always use a tape measure, ruler, or ruled rolling mat. The size should be pretty close to 9″ by 12″ so that we have enough surface to work with when rolling and cutting into equal pieces.
BRUSH WITH MELTED BUTTER
All of that melted butter is going right onto the rectangle of dough.
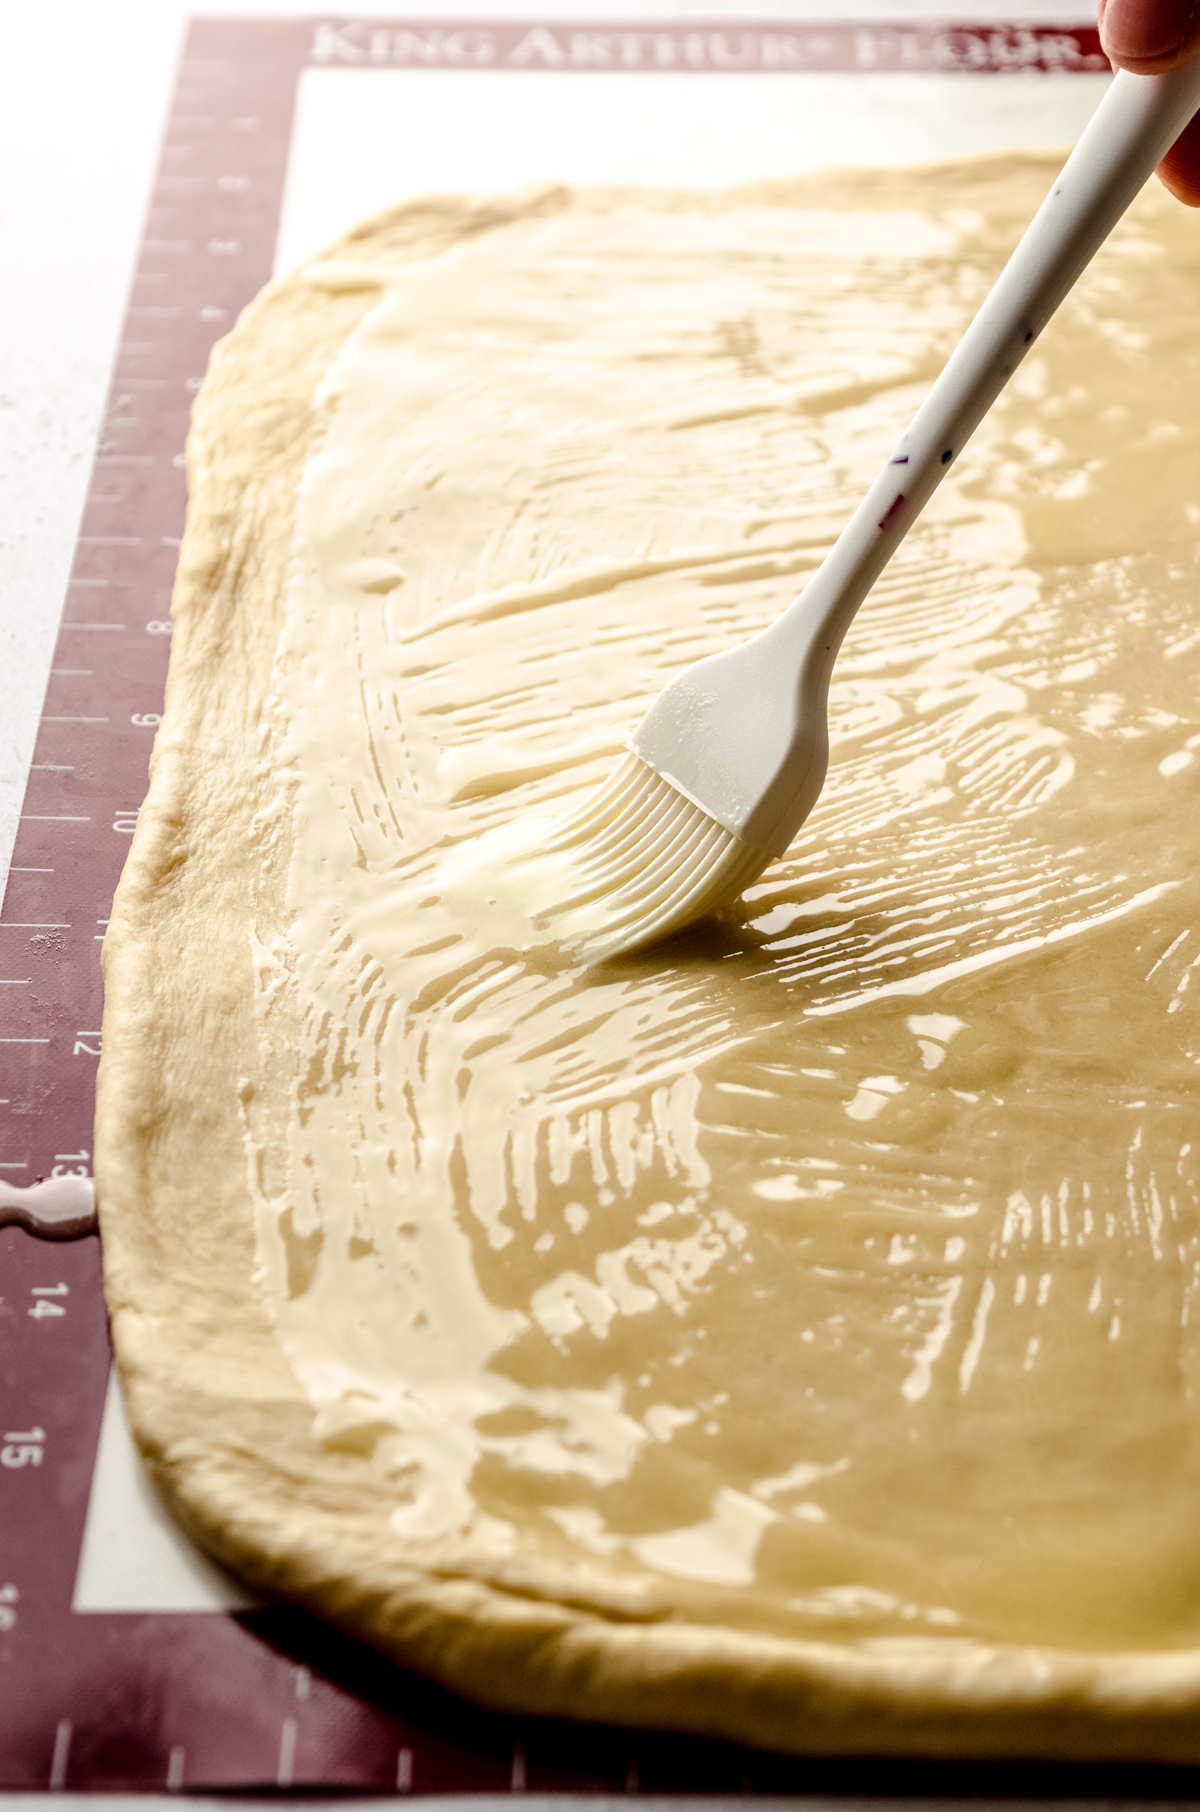
It will seem like a lot of butter, but again, trust the process. Use a pastry brush to brush the butter almost to the edges, leaving about a ½” border.
SPRINKLE WITH FILLING
Next, spread the cinnamon-nutmeg sugar mixture evenly over the melted butter. It will start to soak in, which is what you want.
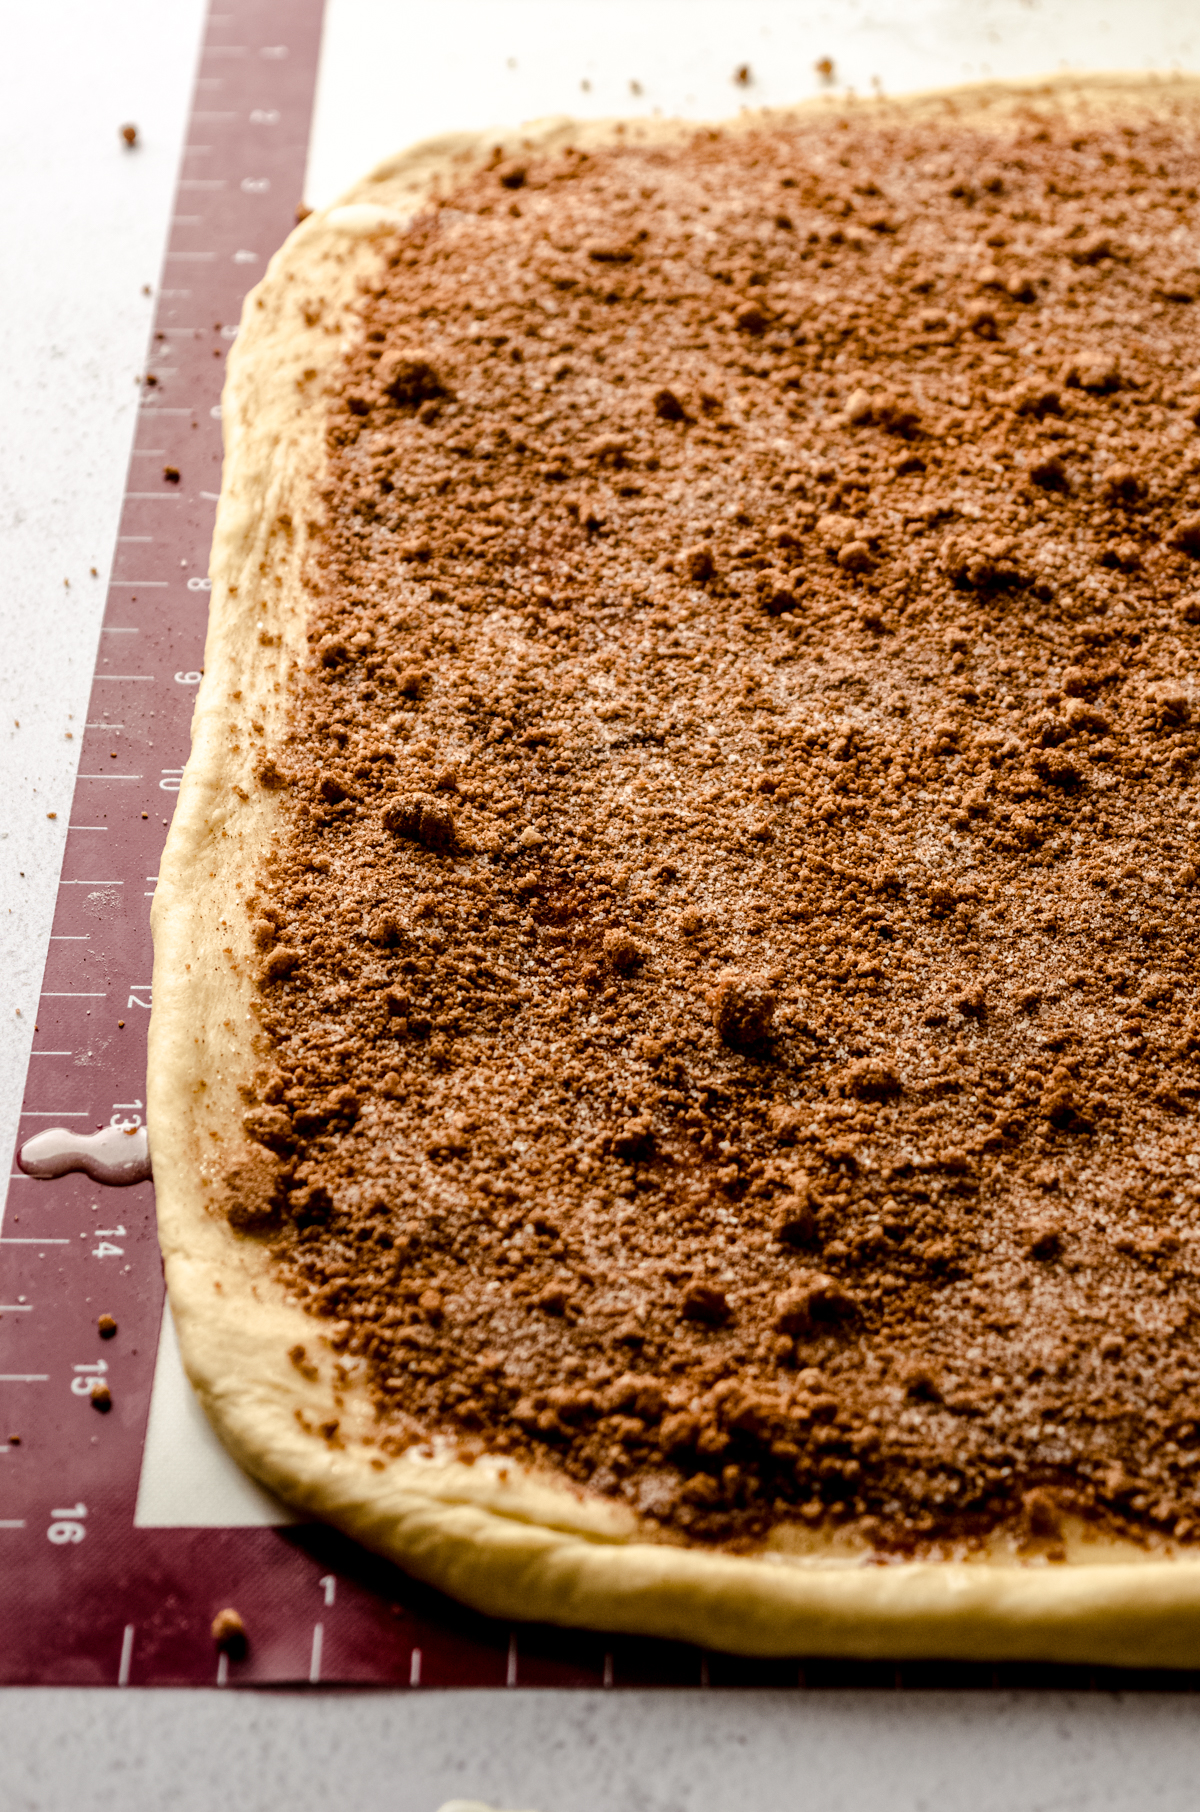
Spread as far as you spread the butter, again, taking care to maintain that ½” border.
ROLL INTO A LOG
After your dough is covered in butter and cinnamon-nutmeg sugar, you’ll roll it into a tight log.
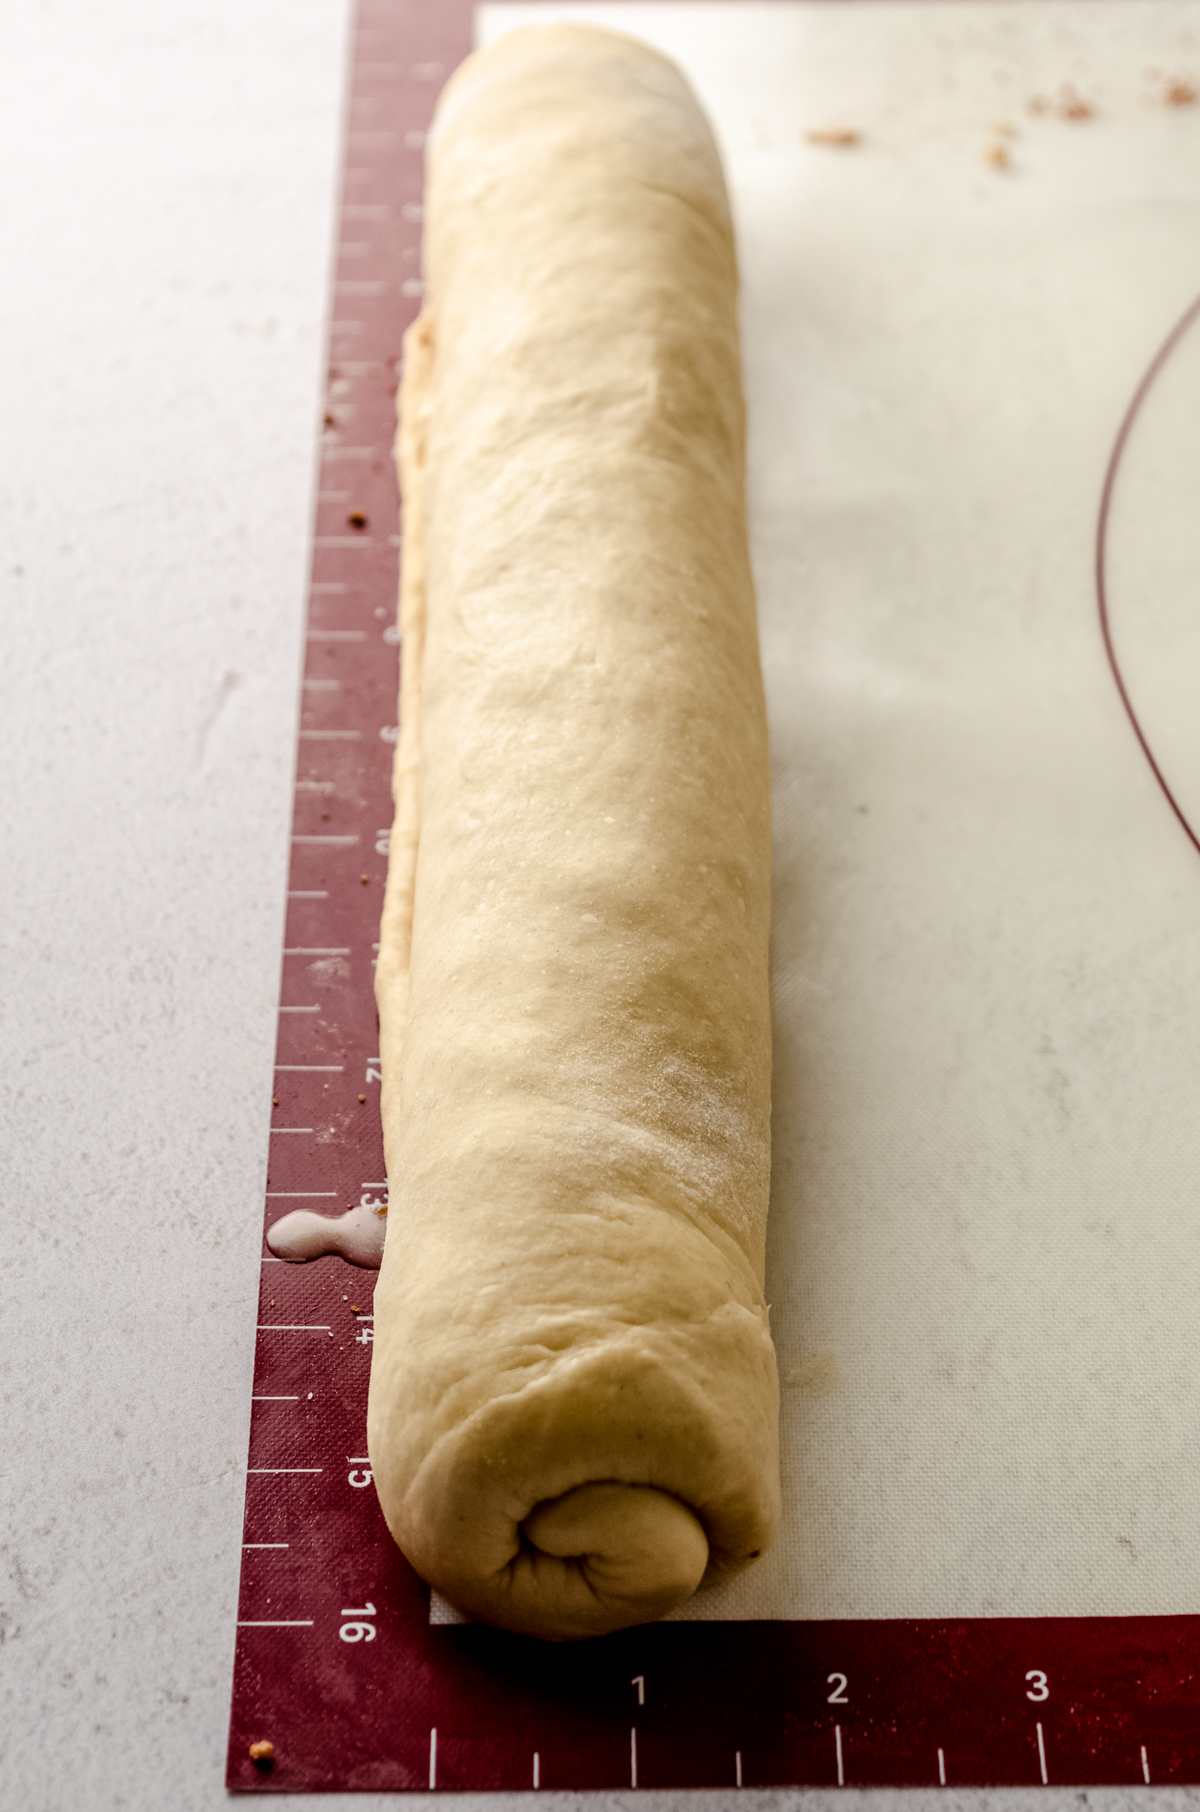
Starting with the 12″ long end, slowly and carefully roll the dough over itself to form a log, doing your best to keep the seam side down. I like to use my fingers or palms on either end of the log to gently squeeze the log to “contain” the uneven ends.
CUT INTO INDIVIDUAL ROLLS
Lastly, cut the log into 6 equal slices. I much prefer to use a sharp knife (serrated works best) to do this step. Lots of folks have had success using the unflavored dental floss method, but I do not love this method.
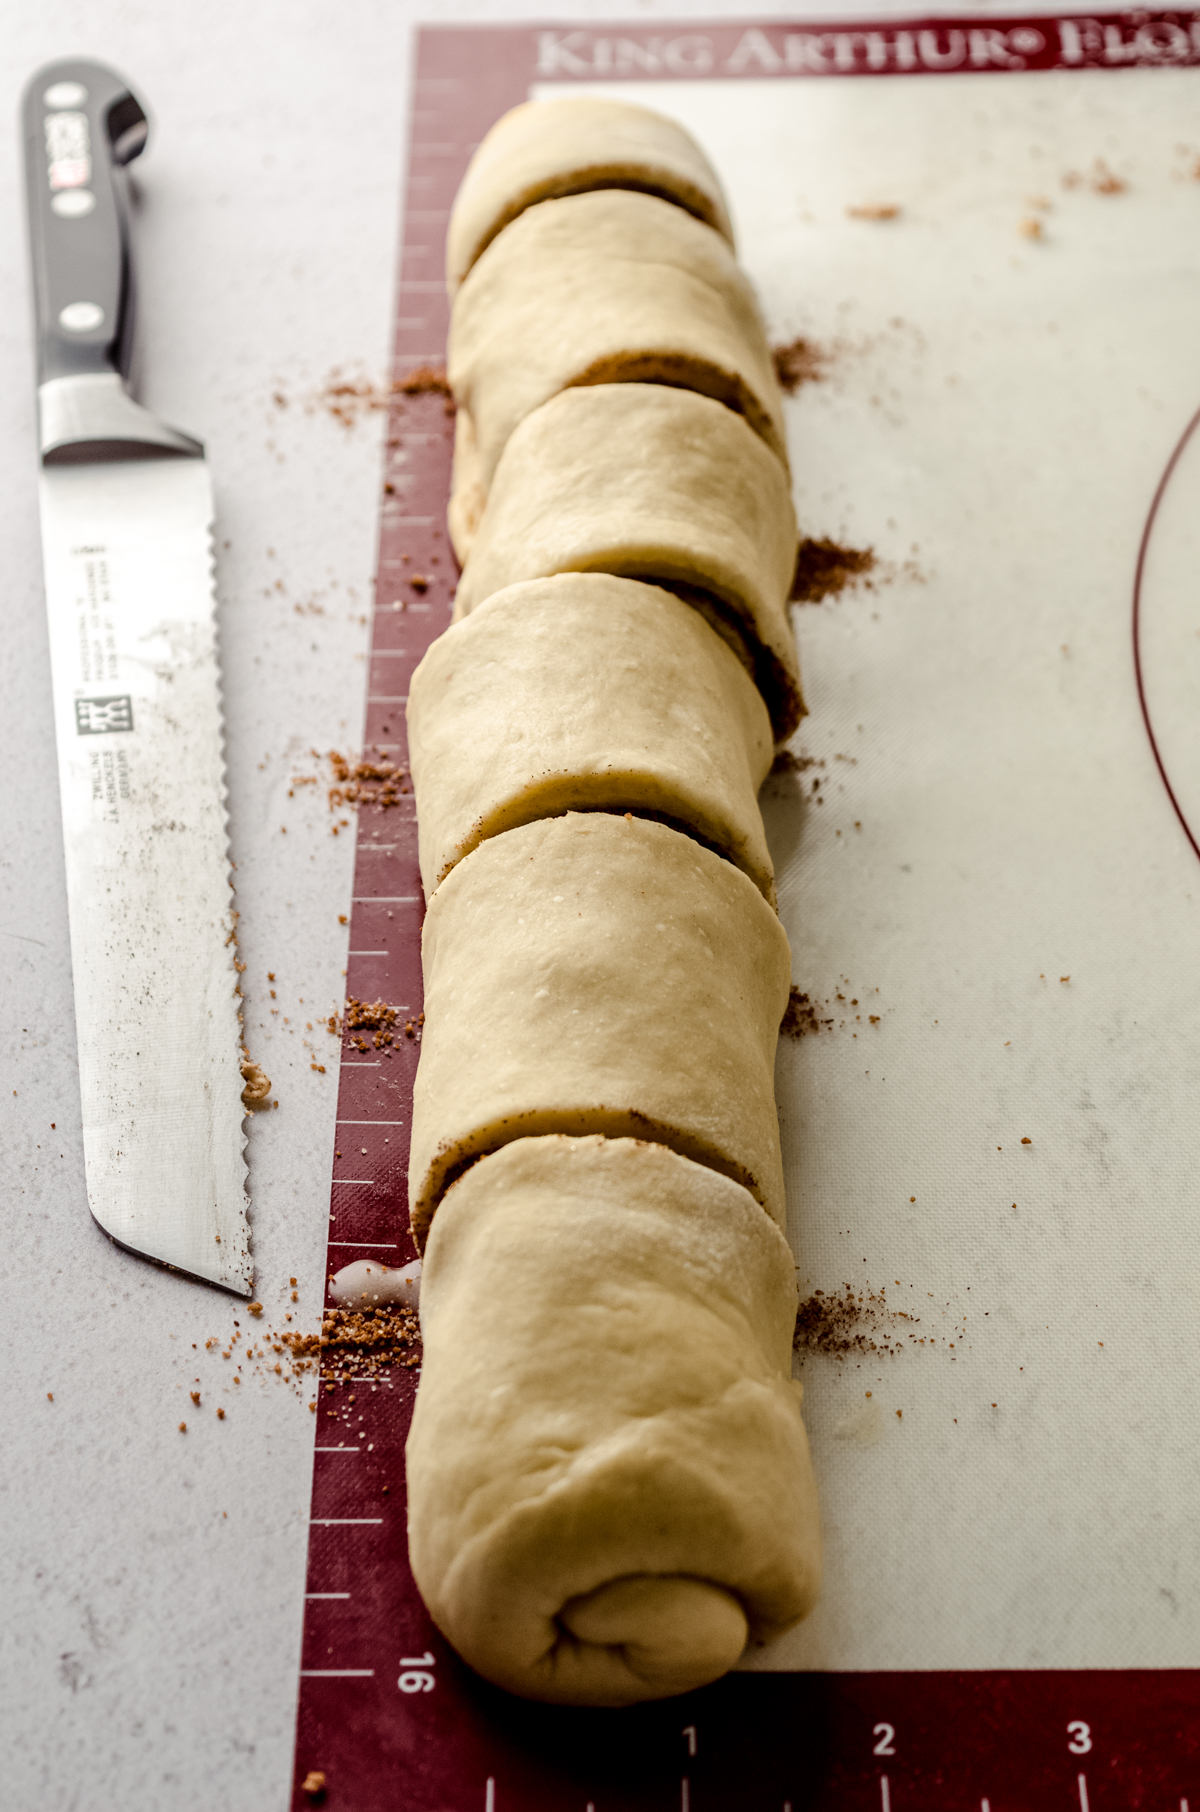
It’s important to use a sharp knife so you don’t smush the rolls, but don’t worry if you ruin the shape. They will still bake perfectly and, most importantly, still taste delicious. Also, don’t worry if filling spills out.
PLACE IN BAKING PAN
Once your log is cut into individual rolls, place them in a prepared pan (sprayed with baking spray) cut side down. I like to use either an 8″ square baking pan (3 rows of 2) or an 8″ or 9″ pie plate or cake pan (1 in the center and 5 evenly spaced around it).
You can really use any small baking dish that will contain 6 rolls nicely.
Gather any cinnamon-nutmeg sugar that fell out, sprinkle that over the rolls, then press gently on the tops of the rolls to slightly flatten. Cover the rolls loosely with foil or a clean dish towel.
ALLOW TO RISE
This is where the rolls will rise for 1 and ½ hours. In this time, they will puff up, which builds gluten structure and builds pockets of air for those flaky layers.

If your kitchen is particularly cold, you may need to let the dough rise for 2 hours or sit them near a heat source.
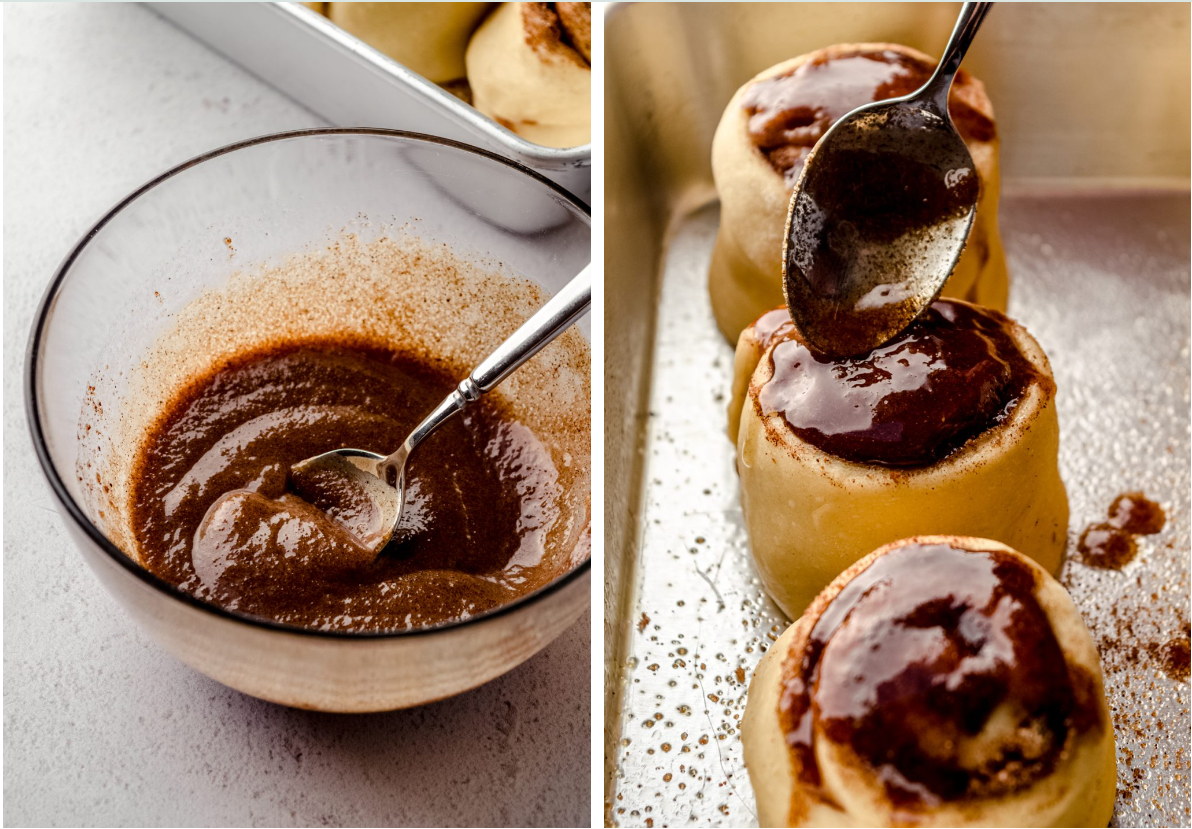
ADD THE TOPPING
Right before baking, make up the syrup topping, simply mix all of the ingredients together in a bowl, then spoon evenly over all 6 of the unbaked rolls.
ADD THE EGGNOG SOAK
Lastly, before the rolls go in the oven, pour the eggnog into the baking dish. Yes… Just pour it right in.
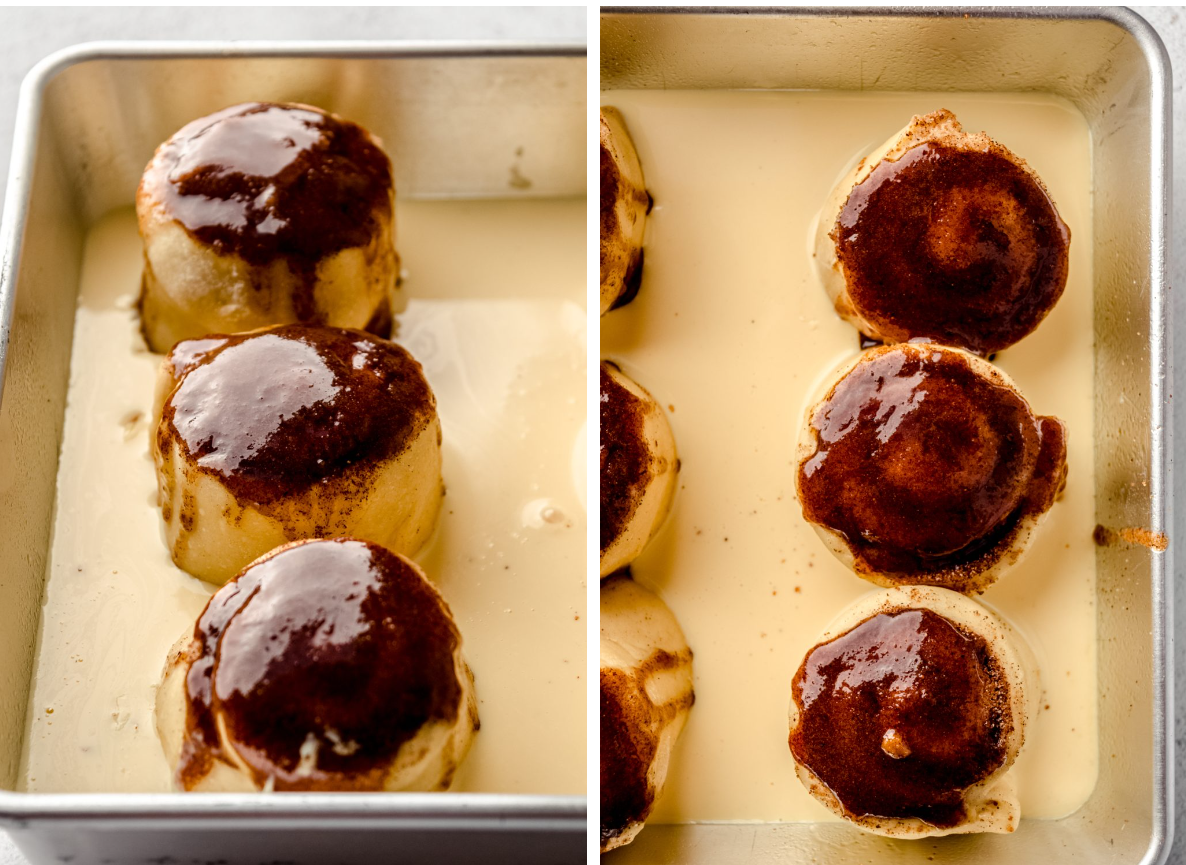
The eggnog should make its way around the dish on its own, but you can encourage it along by swirling your pan or just adding more liquid.
BAKE THE FLUFFY CINNAMON ROLLS
Once your rolls have been topped with the syrup and eggnog has been added to the dish, cover the rolls and bake for 25 minutes. After that time, remove the foil and bake for an additional 5-10 minutes.
Covering the rolls will ensure the rolls soak up the eggnog rather than the heat of the oven evaporating it completely. It will also keep the syrup on top of the rolls from burning.
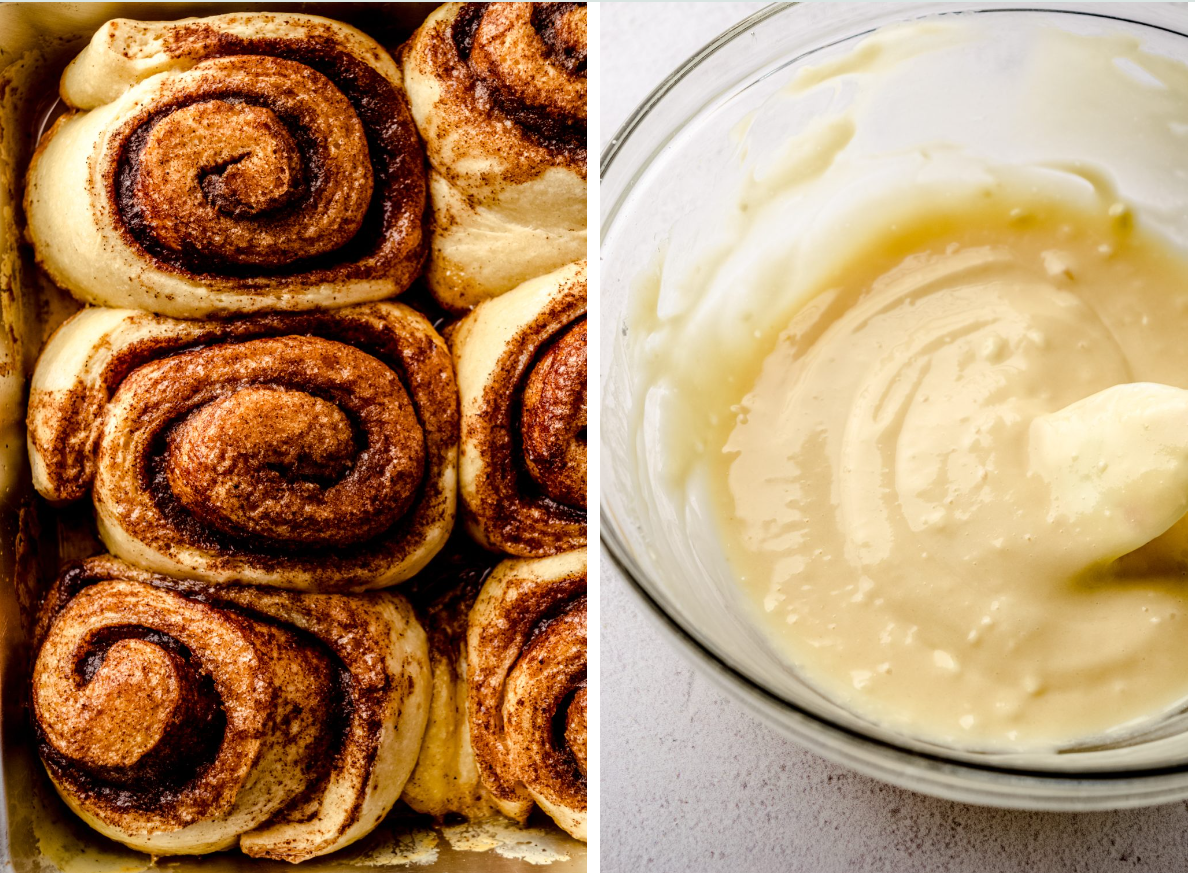
MAKE THE EGGNOG GLAZE
While the eggnog rolls bake, you can make the cream cheese icing.
With a hand mixer or stand mixer, beat cream cheese on medium-high speed until smooth. Next, turn the mixer speed to low and add the powdered sugar. Add the vanilla extract, eggnog, and the salt continue mixing until smooth.
If you feel like you want it to be thinner, add some more eggnog. Just remember that when you spread it onto the warm rolls, the heat from the rolls will start to melt the icing, so it will naturally thin out.
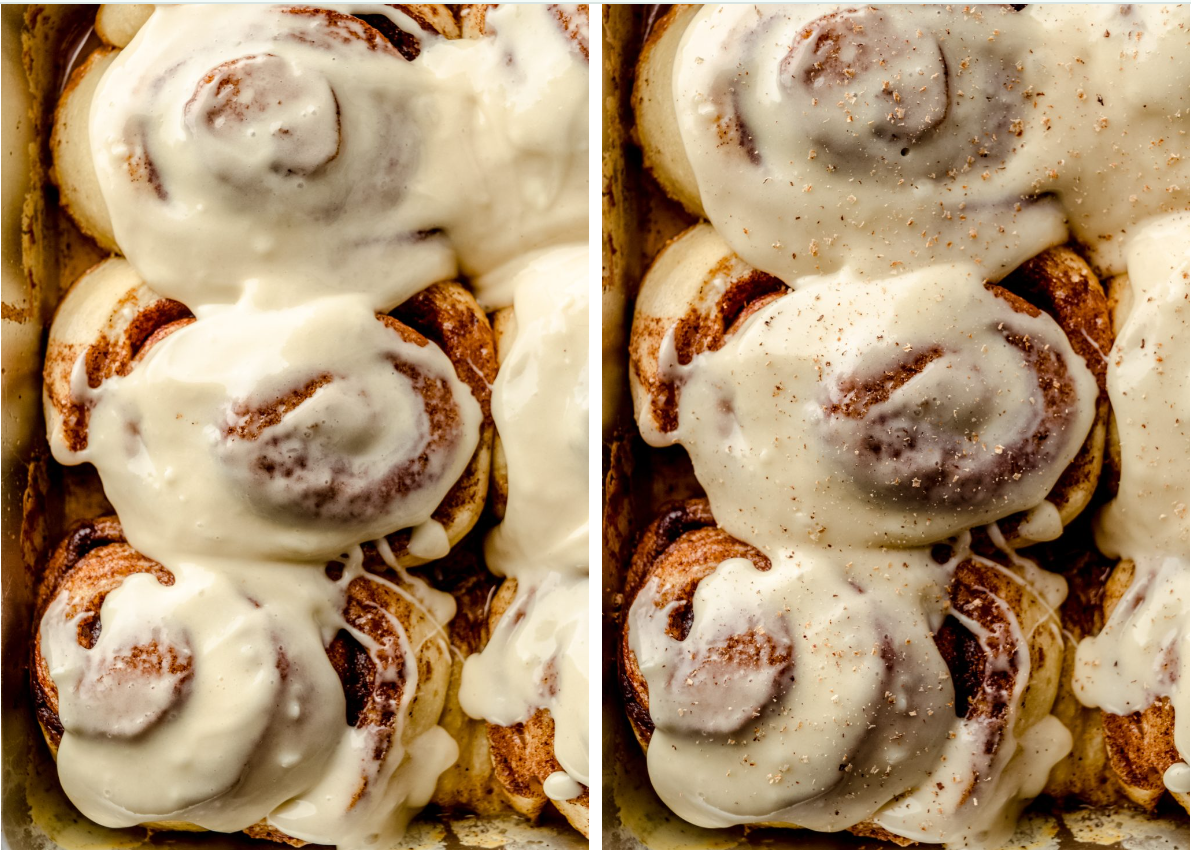
SPREAD ONTO THE WARM CINNAMON ROLLS
Allow your rolls to cool for a bit before adding the icing, about 15 minutes. Believe me, I know it will be so hard to wait, but I promise those rolls will be much more enjoyable not completely piping hot.
Use an offset spatula, silicone spatula, or the back of a spoon to spread the cream cheese frosting into every crevice. You won’t regret that.
Also, I have been known to keep a small bowl of extra cream cheese frosting on hand to spread onto individual bites, but… That’s just me. Highly encouraged for you, of course.
CAN I MAKE THESE EGGNOG CINNAMON ROLLS AHEAD OF TIME?
My favorite part about yeast bread is that YES, you can almost always do things ahead of time, whether it be so that you have warm cinnamon rolls for the morning (hello, Christmas morning or any event during the holiday season that involves a holiday breakfast or brunch!) but don’t have to get up early, or you just want to have some cinnamon rolls in the freezer ready to go if the craving strikes.

CHILL OVERNIGHT
Think of the refrigerator as a “pause” button for your yeast bread. After the rolls are shaped and in the pan, you can cover them tightly and chill them for up to 18 hours and turn them into overnight cinnamon rolls just like that.
This is a great option if you’re making eggnog cinnamon rolls for a holiday– you can spend a bit of time bringing the dough together, then have glorious rolls the next morning with very little hands on time.
You’ll just need to allow the rolls rise for about 1 hour before adding the topping and soaking eggnog and baking them.
You can also make the eggnog cream cheese icing and store it at room temperature up to 18 hours in advance.
FREEZER
If you want to completely bake these eggnog cinnamon rolls and then freeze them, you can keep them in the freezer covered tightly for up to 3 months. Just thaw them overnight in the refrigerator and warm before enjoying.
If you want to freeze unbaked rolls, you’ll need to parbake the rolls for 10 minutes at 350°F (177ºC). Allow to cool completely, cover tightly, then freeze. Remove the rolls from the freezer and allow them to thaw in the refrigerator overnight. Finish baking them the next day for the remaining 18-22 minutes before frosting and enjoying.
CAN I MAKE THESE ROLLS WITHOUT SOAKING IN EGGNOG?
You can absolutely make these eggnog cinnamon rolls without adding the additional eggnog into the dish. You can keep or omit the spiced syrup, your choice. Just don’t add the eggnog to the baking dish and bake uncovered. If you are using the spiced syrup topping, you may want to cover the rolls to prevent burning.

CAN I USE PRE-MADE CINNAMON ROLLS FOR THIS RECIPE?
If you don’t want to make your rolls from scratch, that’s totally fine! Store-bought packages of cinnamon rolls usually have 10 rolls in them, so you’ll want to double the recipe for the syrup topping and use about 1 cup of eggnog for the soak. You will need a 9″ x 13″ baking dish.
There are so many ways to enjoy my favorite homemade cinnamon roll recipe, and I hope that this holiday edition will become a family favorite for you, just like they have ours.